How to shoot the Northern Lights
Photographing the Northern Lights (Aurora) is a dream for many photographers. However, it’s not just a matter of 'point and shoot.' It requires the right technique, patience, and an understanding of the relationship between light and your camera's capabilities.
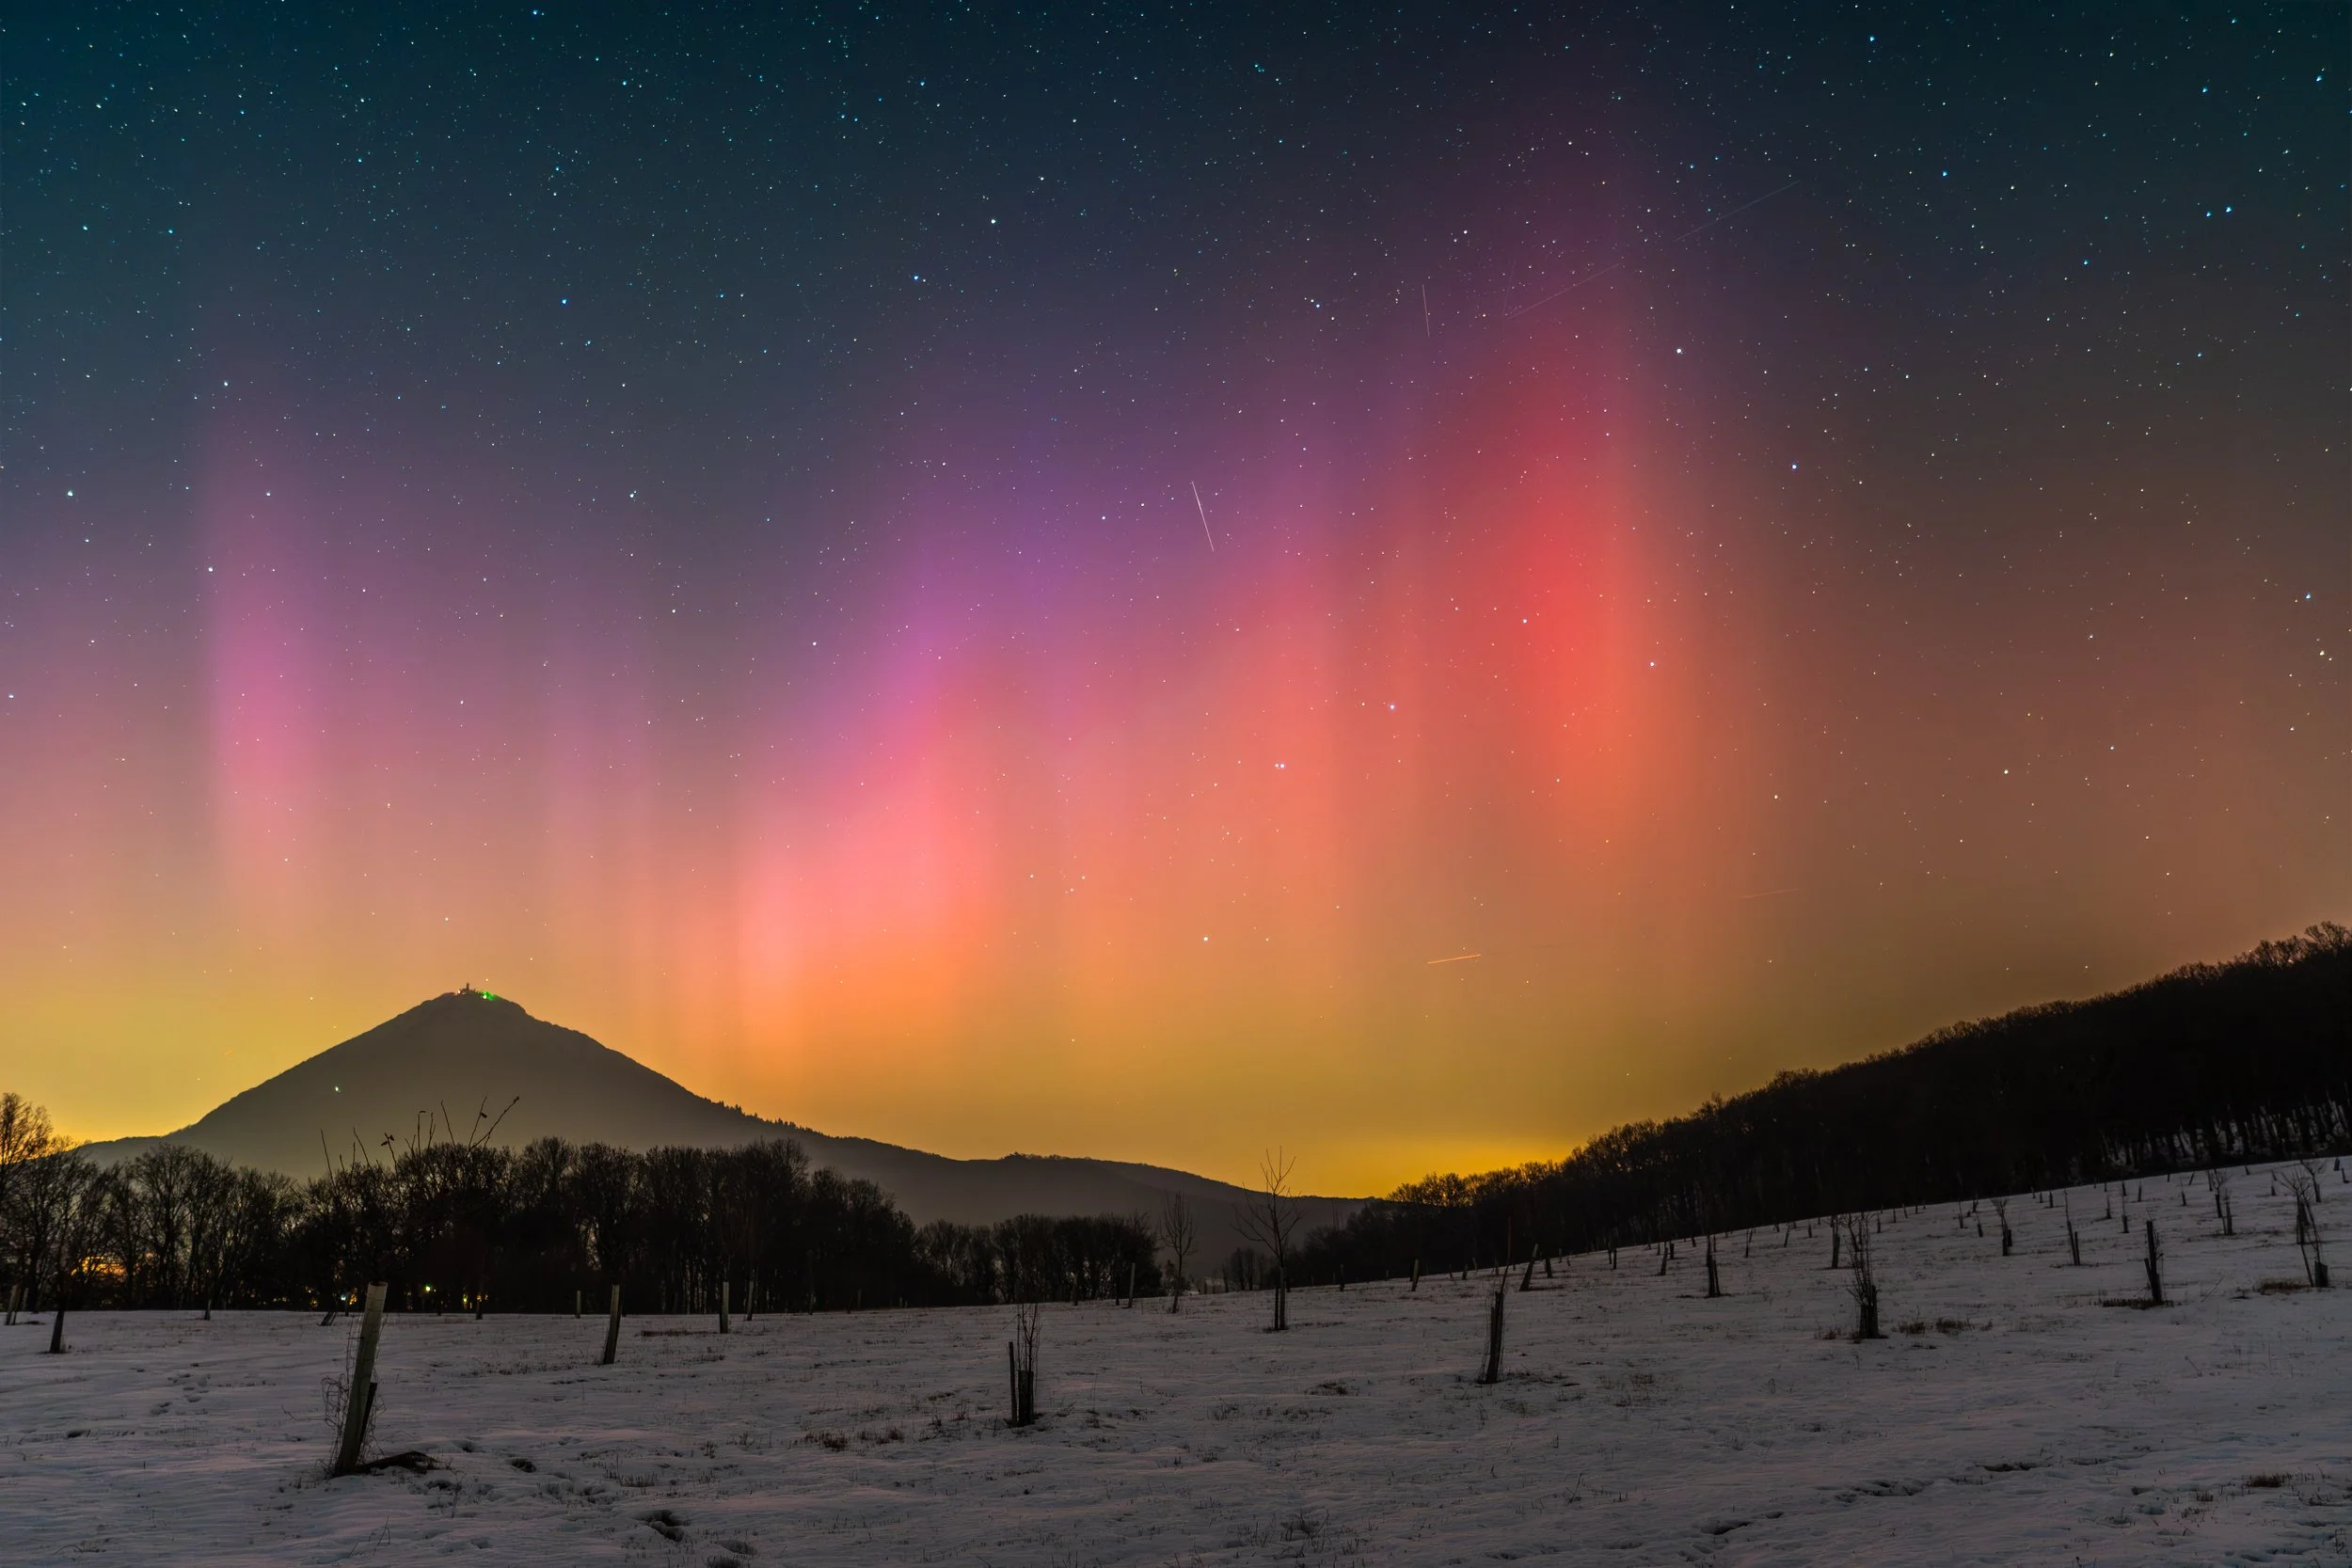
The Northern Lights over Milešovka
1. Gear: Must-Haves for Your Backpack
The essentials:
Camera body with manual mode: DSLR or mirrorless (Full-frame is an advantage due to noise).
Wide-angle and fast lens: Ideally with an aperture of f/2.8 or lower.
Stable tripod: The key to a sharp photo. Winds in the north tend to be strong.
Spare batteries: They drain much faster in the cold (keep them in a pocket close to your body).
2. Night focusing: Forget about autofocus
Autofocus will fail in complete darkness. You must switch to manual focus (MF).
The infinity method: Set your lens to the infinity symbol (∞). Be careful, as on many lenses, "true infinity" is located slightly before the physical stop of the focusing ring.
Focus Magnifier: Use the digital zoom on your display, find the brightest star or a distant light from a lamp or a house, and turn the ring until it becomes the smallest possible point.
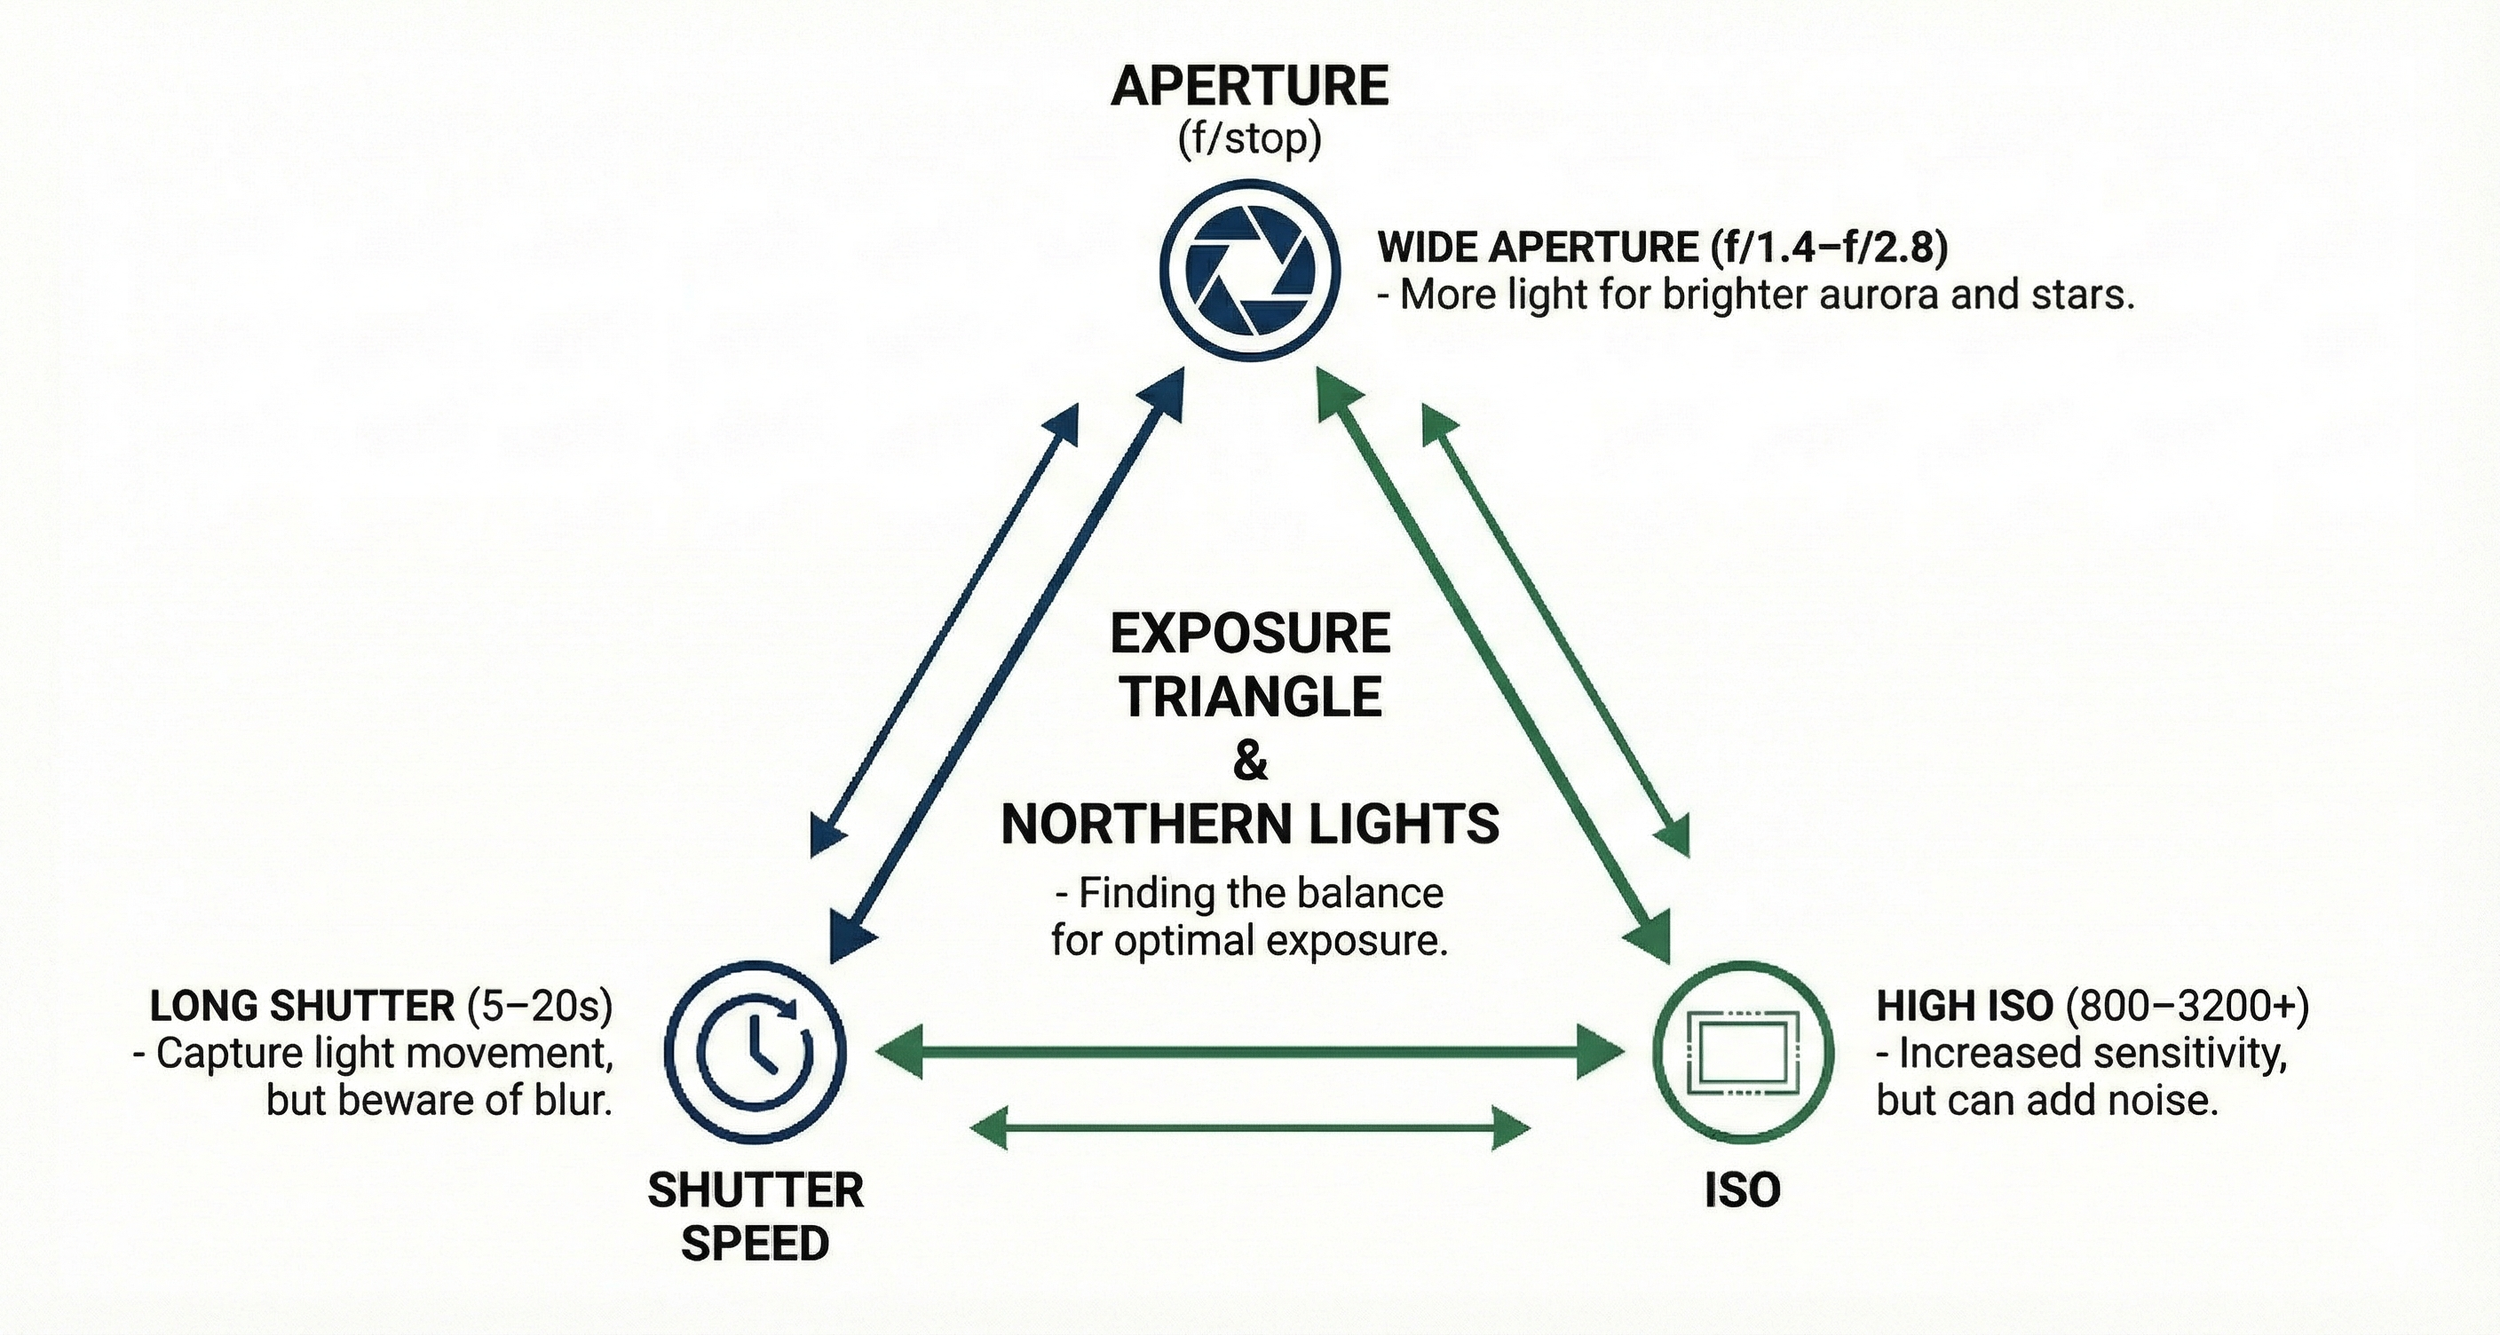
3. The exposure triangle for the aurora
Shutter Speed: Texture vs. mist
Fast aurora (2–5 s): If the aurora is moving quickly, choose a short shutter speed. This will preserve texture and structure (vertical pillars).
Slow aurora (10–20 s): If the aurora is faint and sluggish, a longer exposure will brighten it beautifully, but expect it to "smear" into a colorful mist.
Aperture: Finding the "Sweet Spot"
In theory, we want the lowest possible number (e.g., f/1.8) to allow the maximum amount of light onto the sensor.
Practical tip: Lenses like the Samyang 24mm f/1.8 can be soft in the corners when shot wide open. By stopping down to f/2.8, you will lose a bit of light, but you will get much sharper stars at the edges of the photo. If you have a subject in the foreground, a higher f-number will also help you keep the entire scene in focus (depth of field).
ISO: Don’t fear digital noise
Modern sensors (e.g., in the Sony A7 III) handle high sensitivity exceptionally well.
Don’t be afraid of ISO values between 3200 and 6400.
Today's software (like Lightroom Denoise AI) can eliminate noise incredibly effectively. It is always better to have a noisy but sharp photo than a dark, blurry mess.
4. White Balance: Why is Auto WB a trap?
If you are shooting individual shots in RAW, WB doesn’t matter as much (you can fix it in post-processing). However, for a time-lapse, a fixed WB setting (e.g., 3500–4500 K) is critical.
Why? Auto WB reacts to changes in surrounding light. If someone shines a flashlight into your shot or a car drives by in the distance, the camera will try to "balance" the scene and change the tint of the entire sky. The resulting video will then have an unpleasant color flicker.
5. Exposure under control: Histogram and Zebra
The camera display lies at night – it glows in the dark, making the photo look brighter than it actually is.
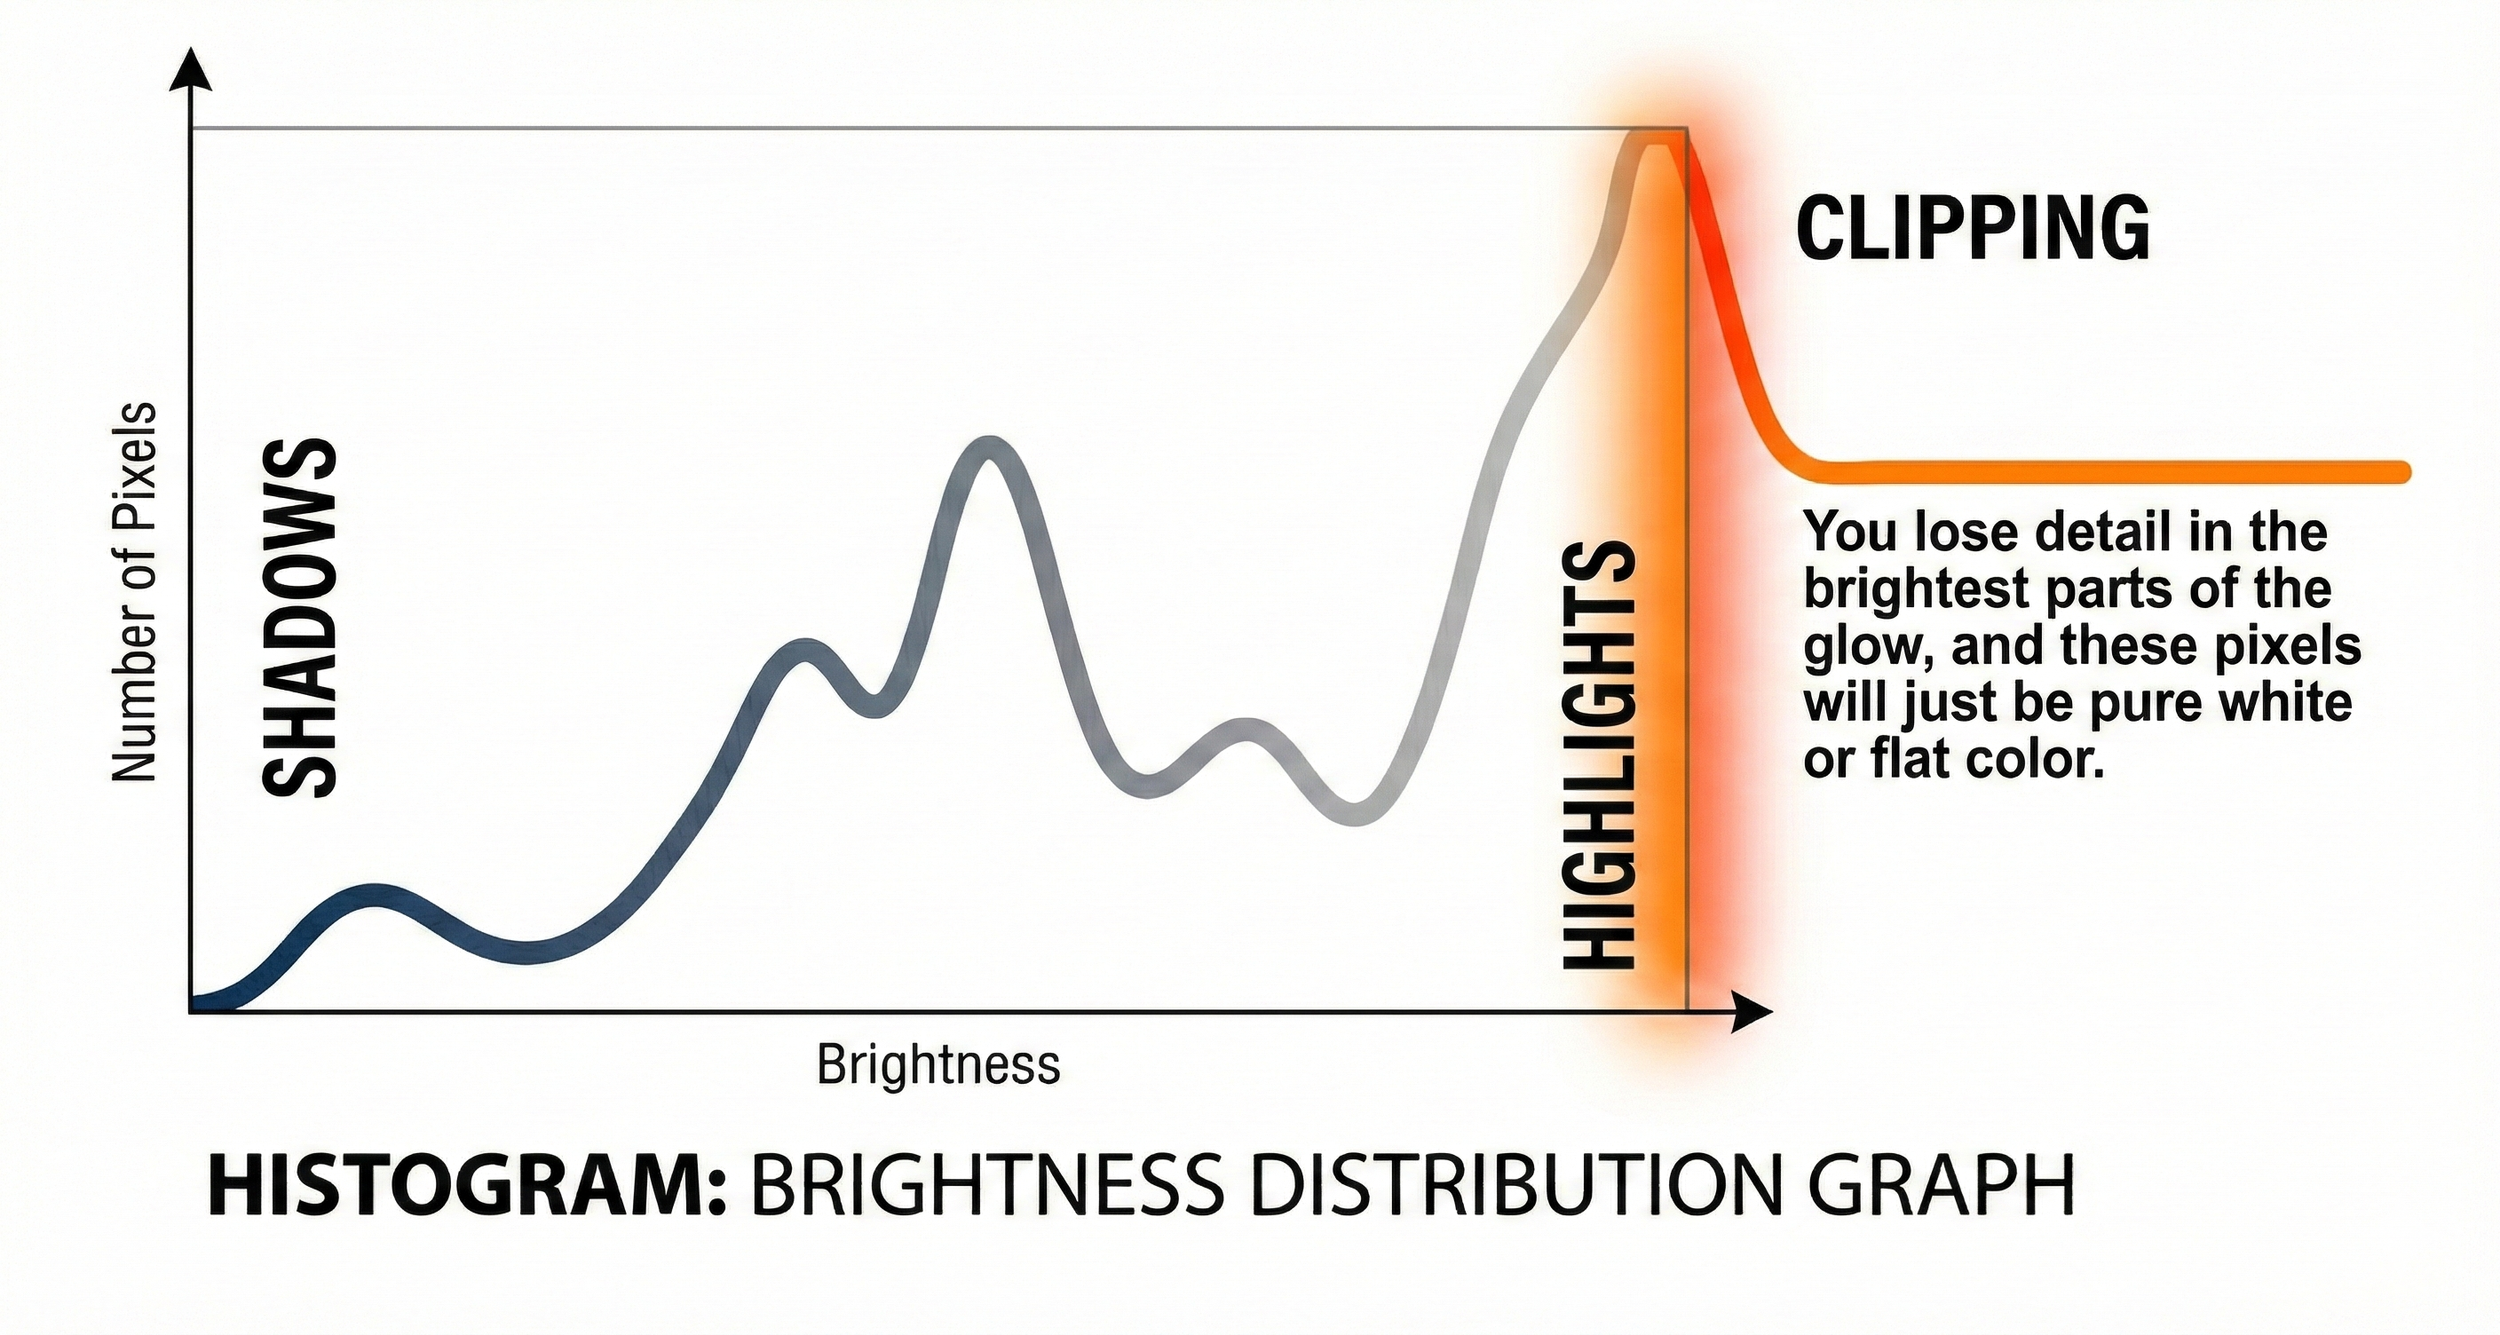
Histogram – your best friend.
The histogram is a graph showing the distribution of brightness.
Left side: Shadows
Right side: Highlights
If the graph "hits" the right wall, clipping occurs. You lose detail in the brightest parts of the aurora, and these pixels will be just pure white or color-flat.
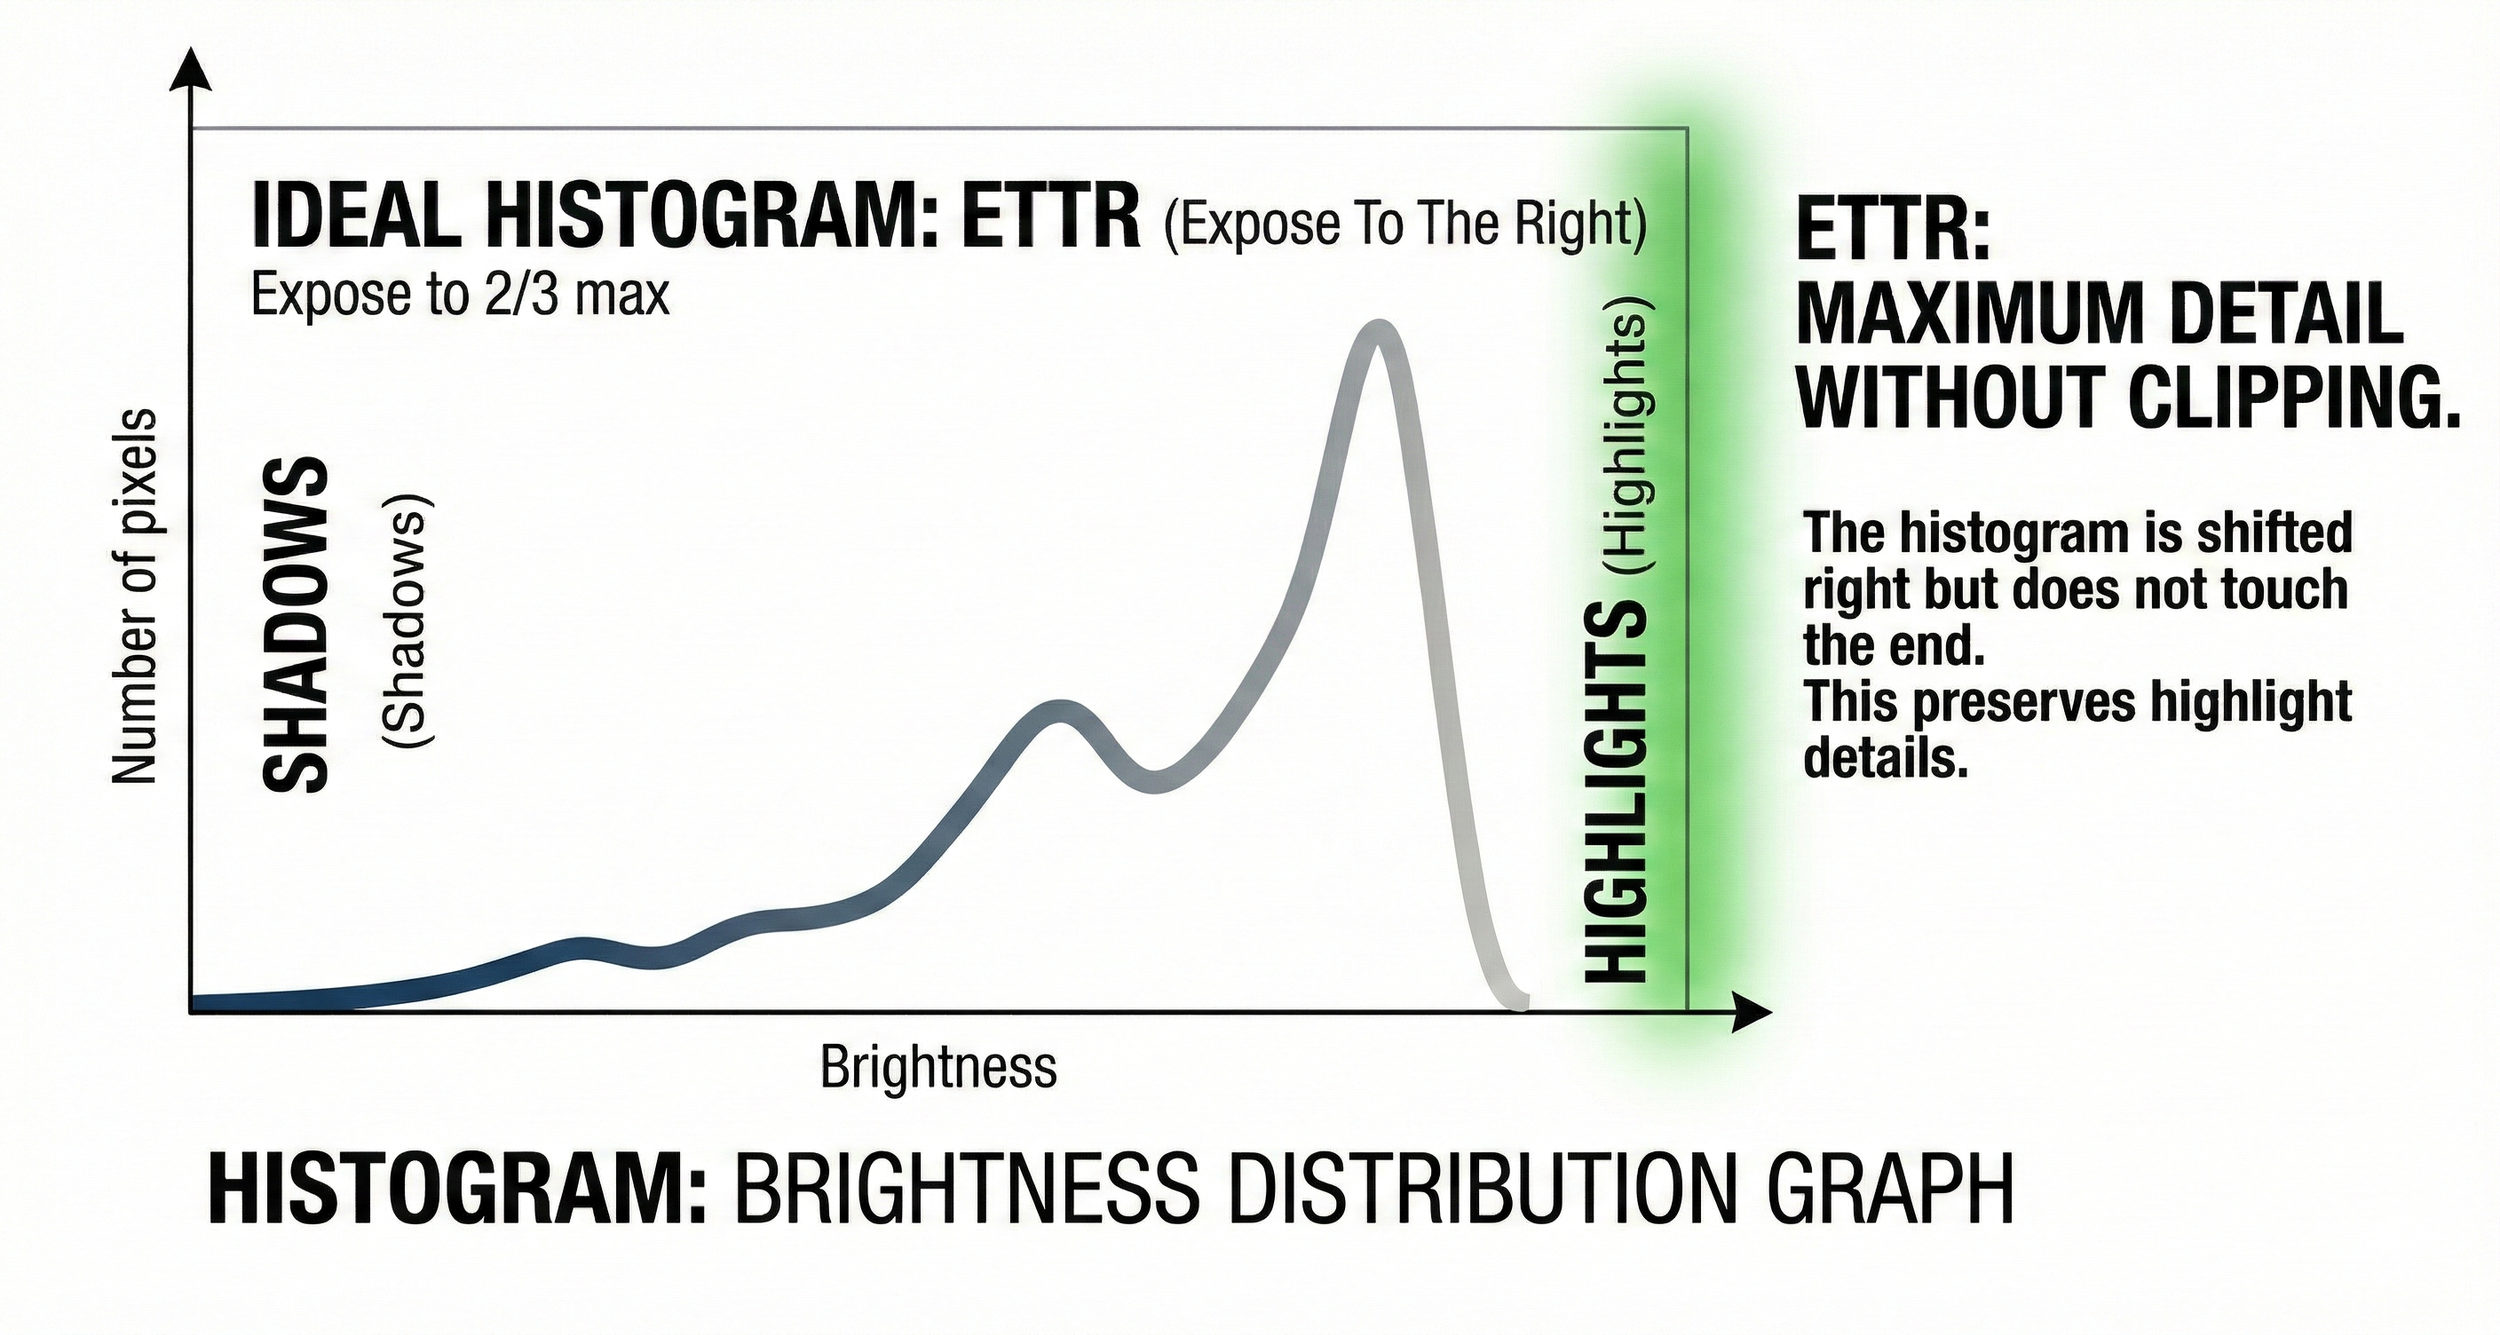
Expose for shadows or highlights?
In night landscapes with the aurora, we always expose for the highlights (ETTR – Expose To The Right). We try to push as much data to the right as possible without "overflowing" over the edge. You can pull shadows out of the darkness in an editor much more easily than you can recover information from a blown-out white area.
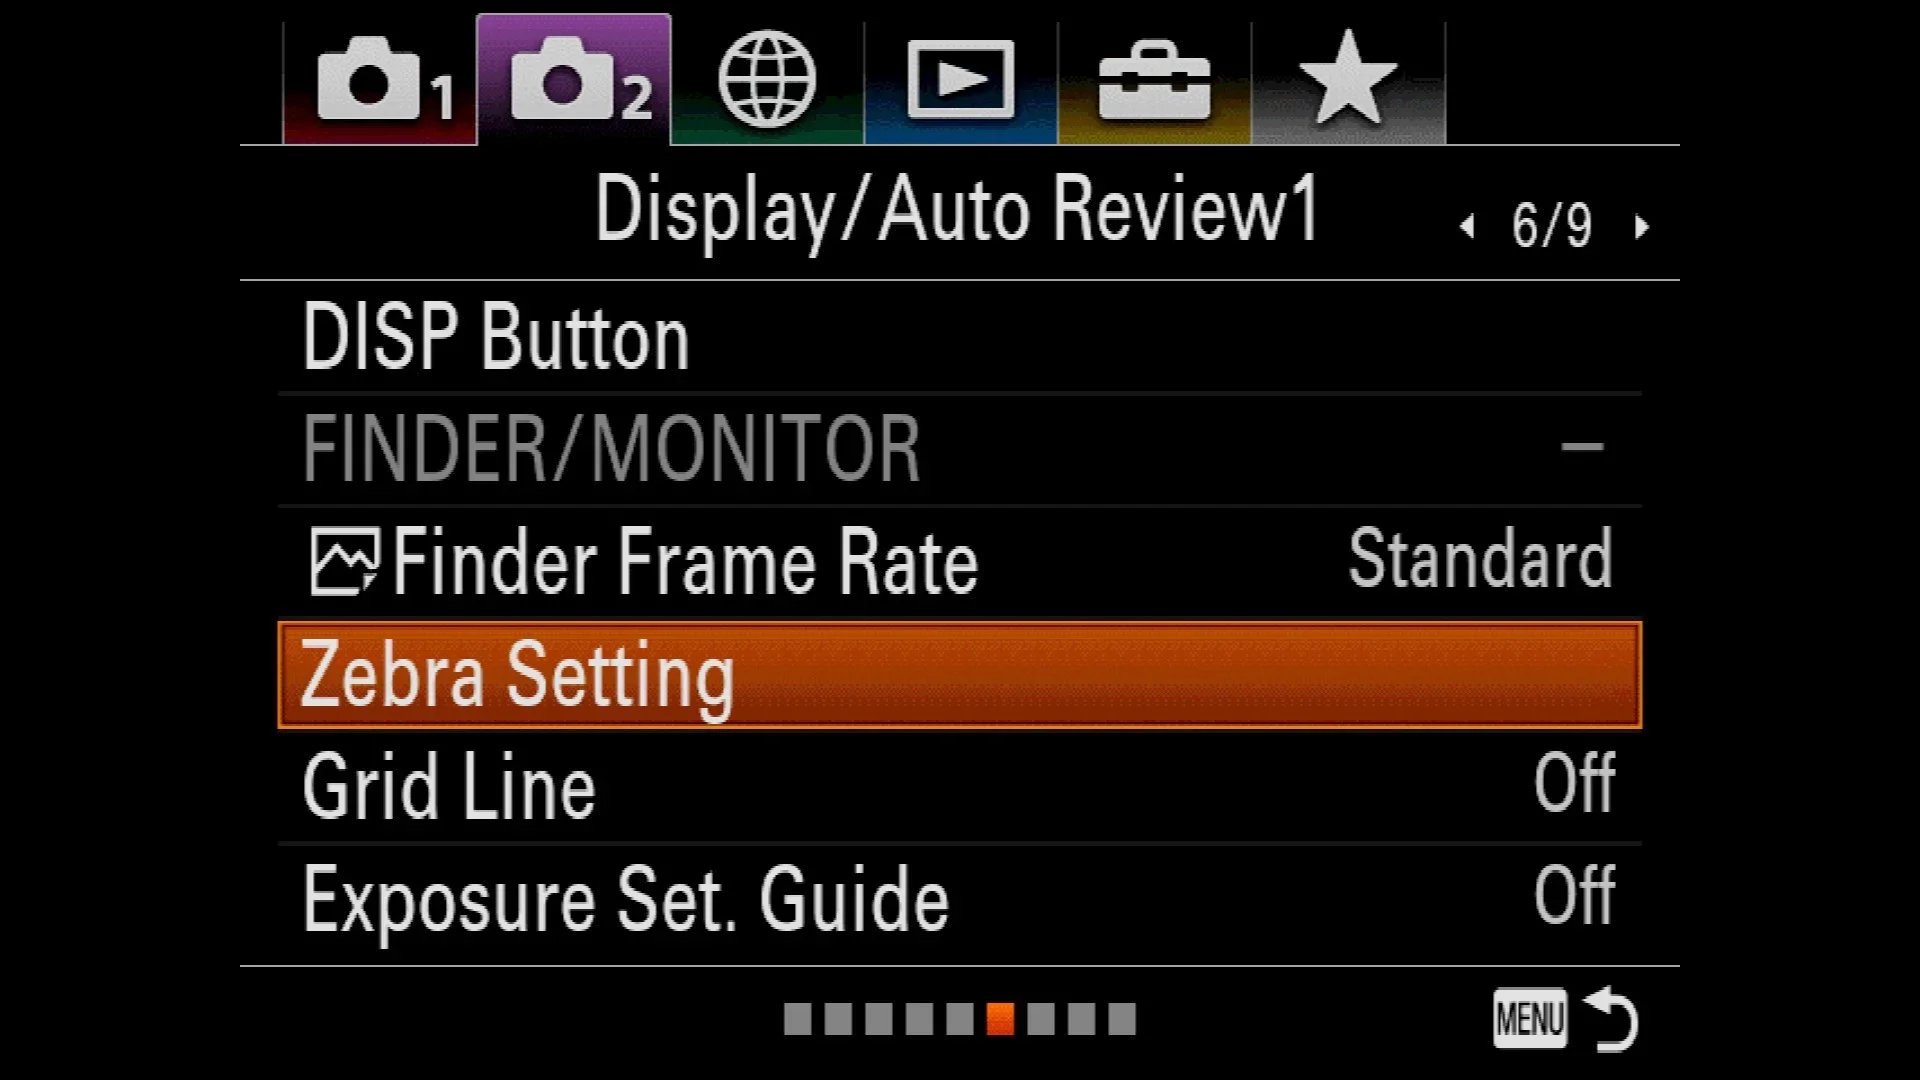
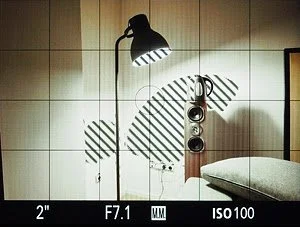
The "Zebra" function
Activate the Zebra function in your camera. It will show stripes (hatching) directly on the display (or in the viewfinder) in areas that are overexposed. If you see the zebras in the brightest band of the aurora, slightly shorten the shutter speed or lower the ISO.
6. The First Shot: Where to start?
Theory is one thing, but in the freezing cold and darkness, you need a clear starting point to work from. If you're not sure how to set up the scene for the first time, choose this "golden standard" for shooting the aurora:
Aperture: f/1.8 (or the lowest your lens allows)
ISO: 3200
Shutter Speed: 10 seconds
In most cases, this combination will show you exactly what is happening in the sky (often revealing things that the naked eye cannot even see yet).
Trial and Error Method (Tuning to Perfection)
As soon as you take your first test shot, check it immediately using the tools we’ve discussed:
Is the photo too dark? (The histogram is pushed all the way to the left): Increase the ISO to 6400 or lengthen the shutter speed.
Is the aurora lacking detail and glowing too brightly? (Zebras are flashing, the histogram is hitting the right wall): Decrease the shutter speed to 5 seconds or lower the ISO.
Are the stars in the corners blurry? (Lens aberration): Stop down to f/2.8
By following this process, you will work your way toward a technically perfect photograph within 2–3 shots—one that features accurate colors, sharpness, and rich detail.
And how to edit such photos ? We'll take a look at that in the next post :)