How to Edit Northern Lights Photos
You’ve returned from the freezing cold with a full memory card, excited about the results. After uploading them to your computer, however, you might feel a bit disappointed. The photos are too dark or too bright, lacking contrast, and the colors just aren’t right. That’s perfectly fine – you shot in RAW format, and that needs to be "developed."
We’ll go through a step-by-step process in Adobe Lightroom to turn a "flat" shot into a photo that will take your breath away.
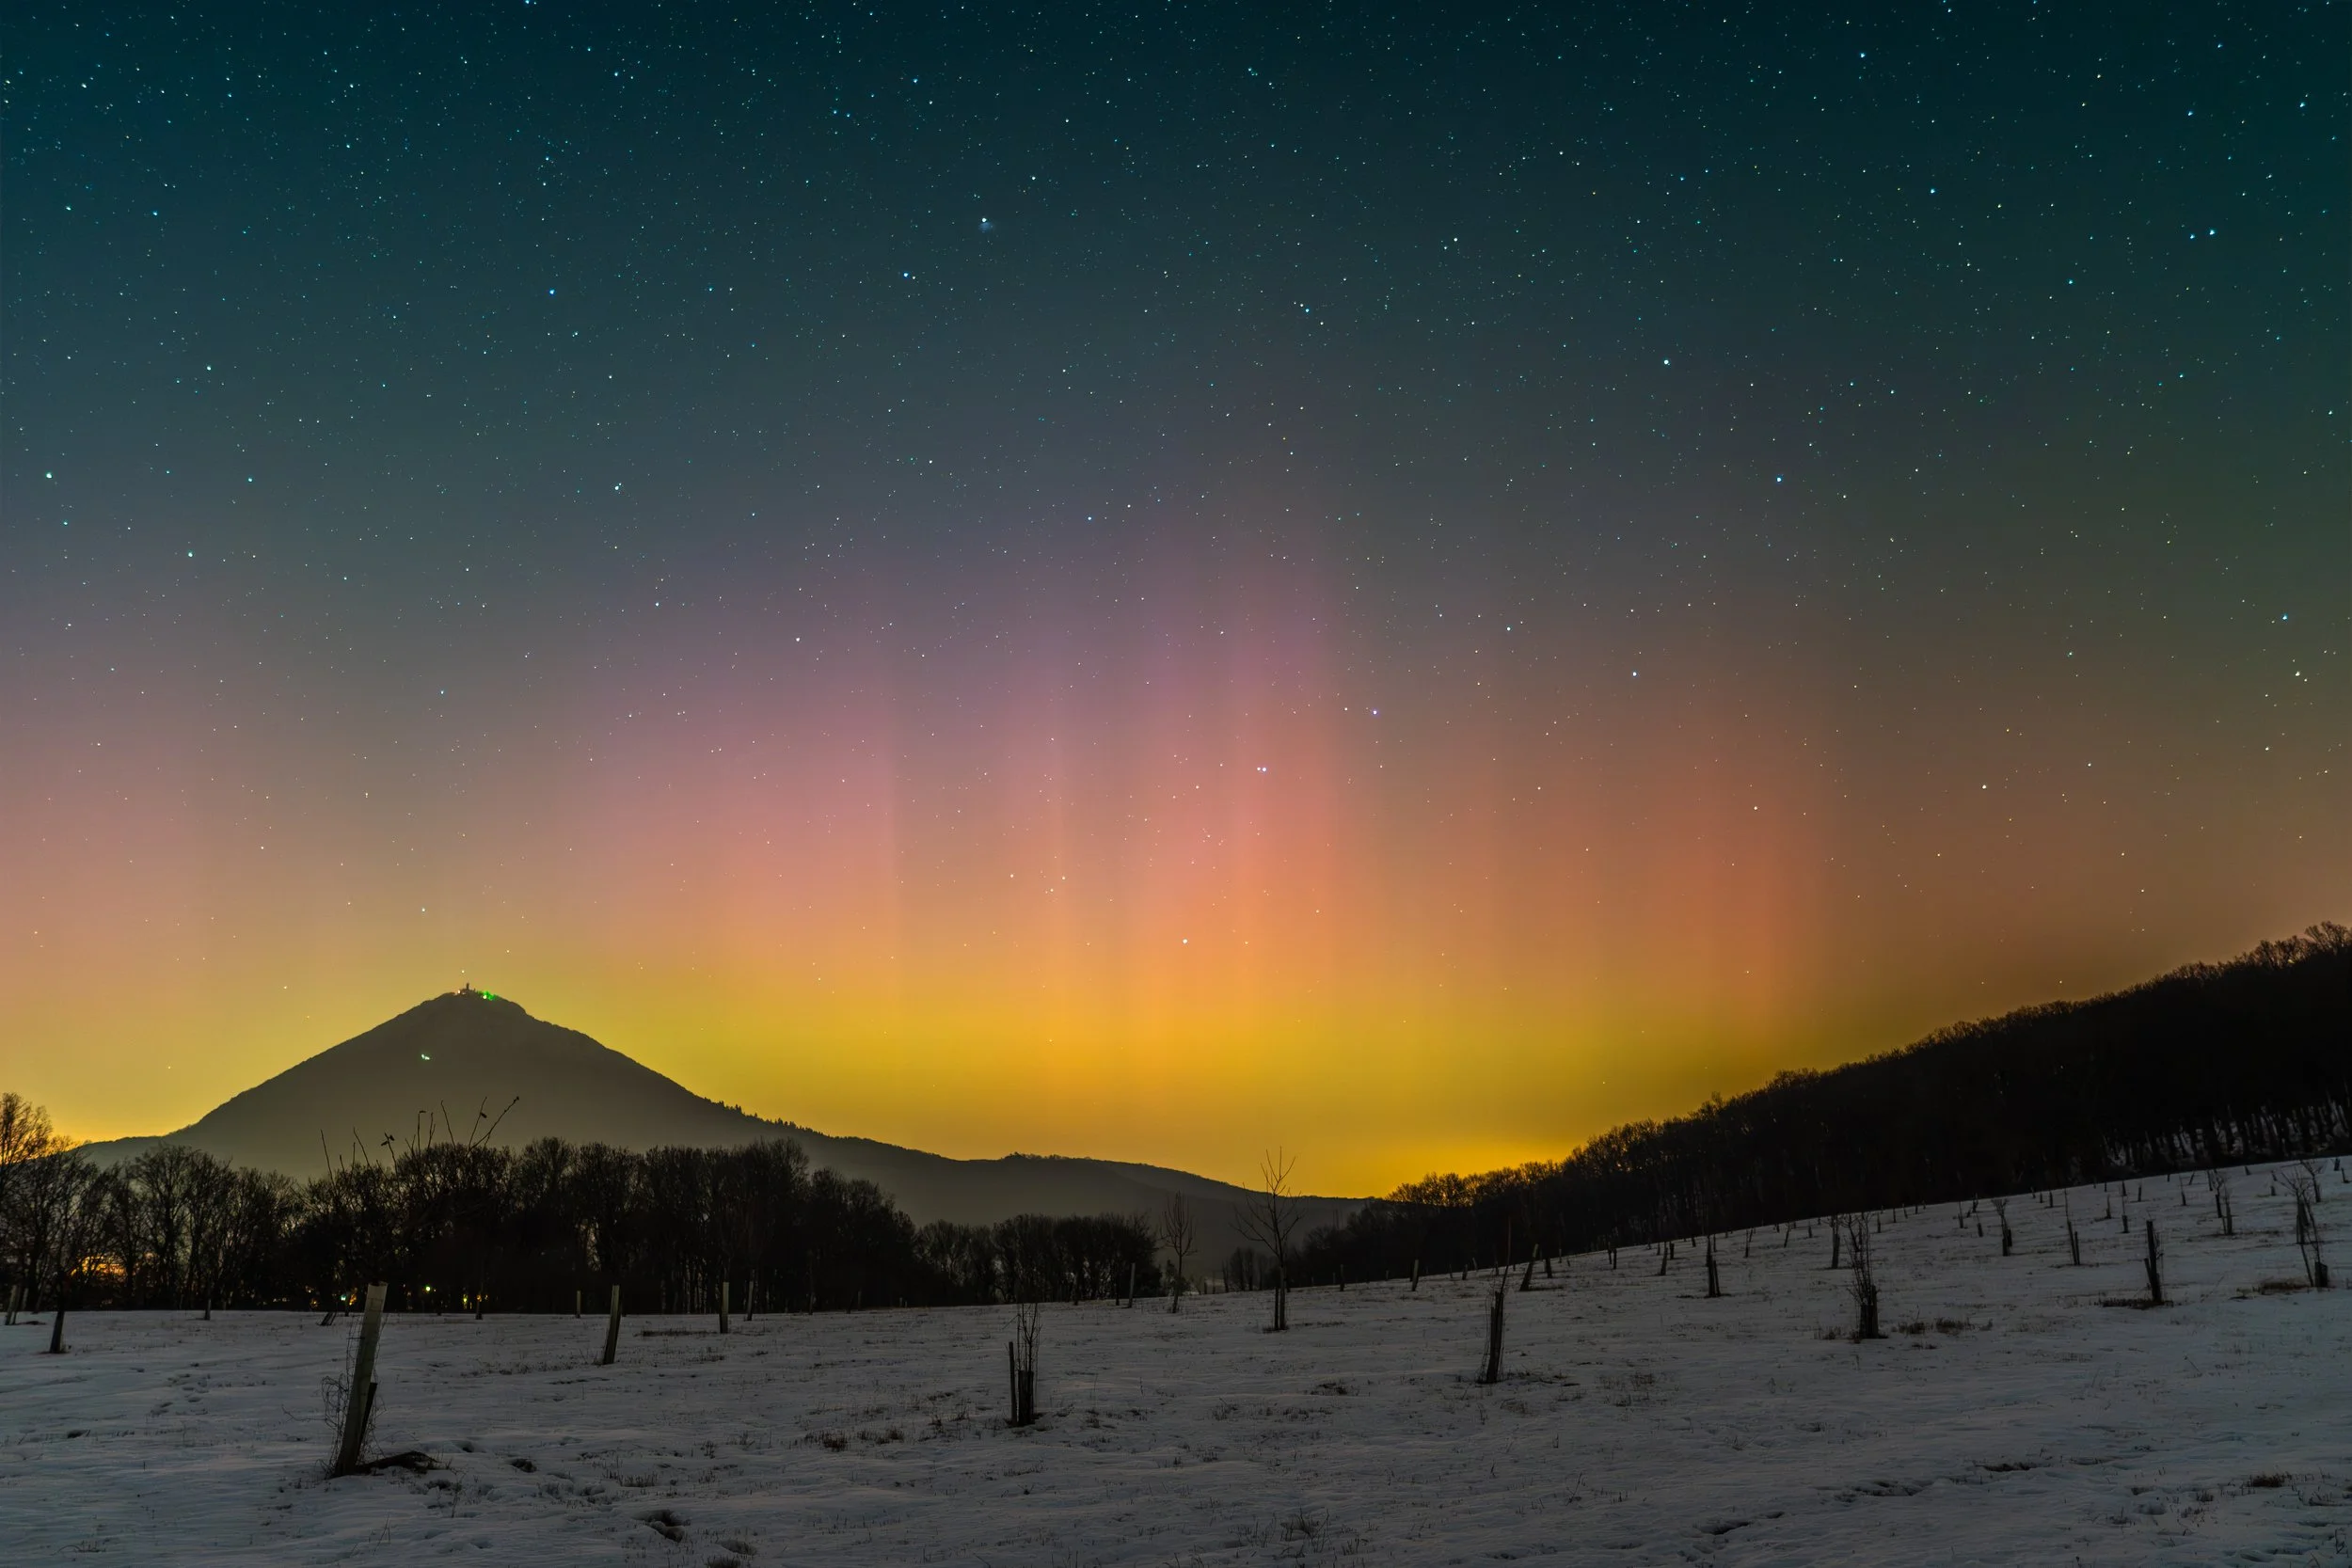
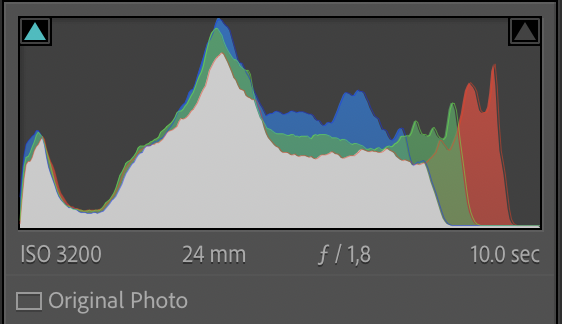
The RAW photo I’ll be editing looks like this:
In my previous tutorial, I wrote about the "ETTR – Expose To The Right" technique. On this particular photo, however, I pushed further to the right edge than I would have liked. If the aurora had intensified during the evening, I would have certainly overexposed parts of it. Ideally, you should aim to expose to about two-thirds of the histogram.
1. Global adjustments: Basic exposure and contrast
I start by working on the entire photo to balance highlights and shadows and set the stage for local adjustments.
Basic Exposure: I start by lowering the exposure. This helps protect the highlights from blowing out and creates a moody night atmosphere.
Extracting details: To get as much information as possible, I pull the Highlights down (restoring detail in the bright parts of the aurora) and push the Shadows up (brightening the dark landscape).
Dynamics: To increase contrast, I boost the Whites and pull down the Blacks. The overall Contrast slider is also slightly increased.
Structure: To ensure the aurora isn't just a blurry smudge but has clear features, I significantly increase Clarity.
Overall color: Instead of saturation, I work with Vibrance, which I increase to pop the colors without making them look radioactive. I leave Saturation untouched.

Tone Curve: To fine-tune the contrast, I use a gentle "S-curve"—slightly pulling down shadows and lifting highlights, which gives the image a nice "pop."
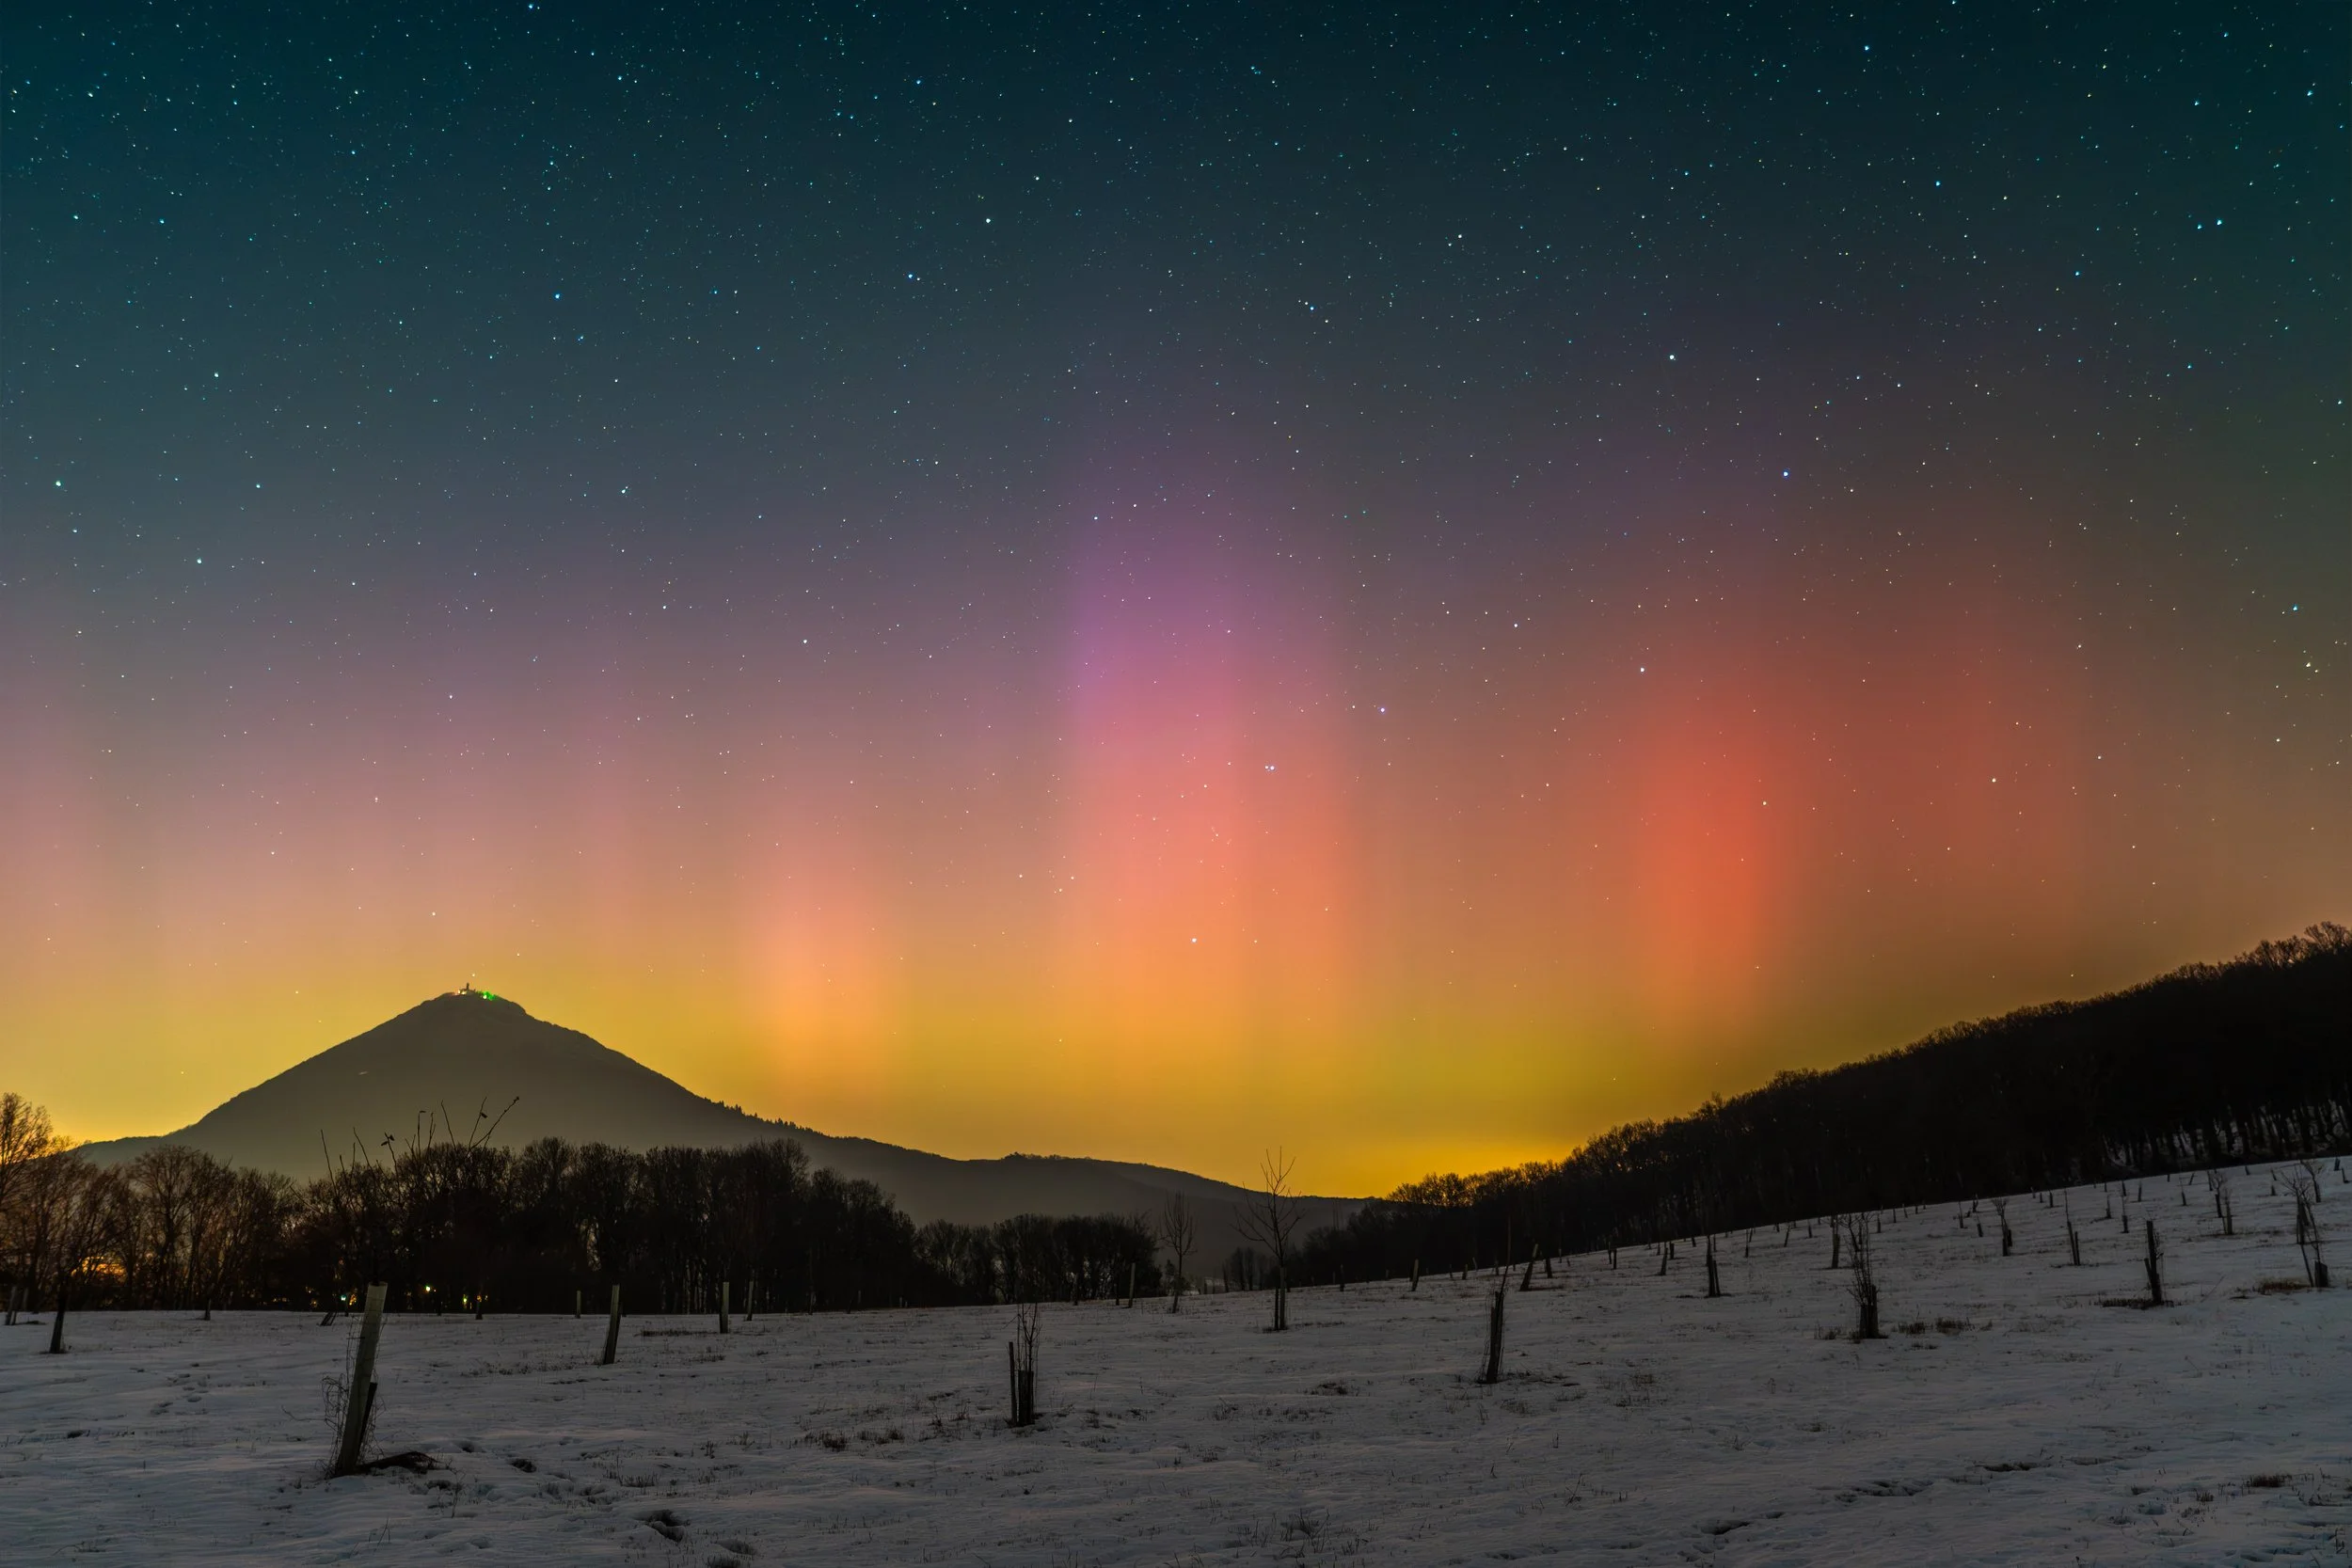
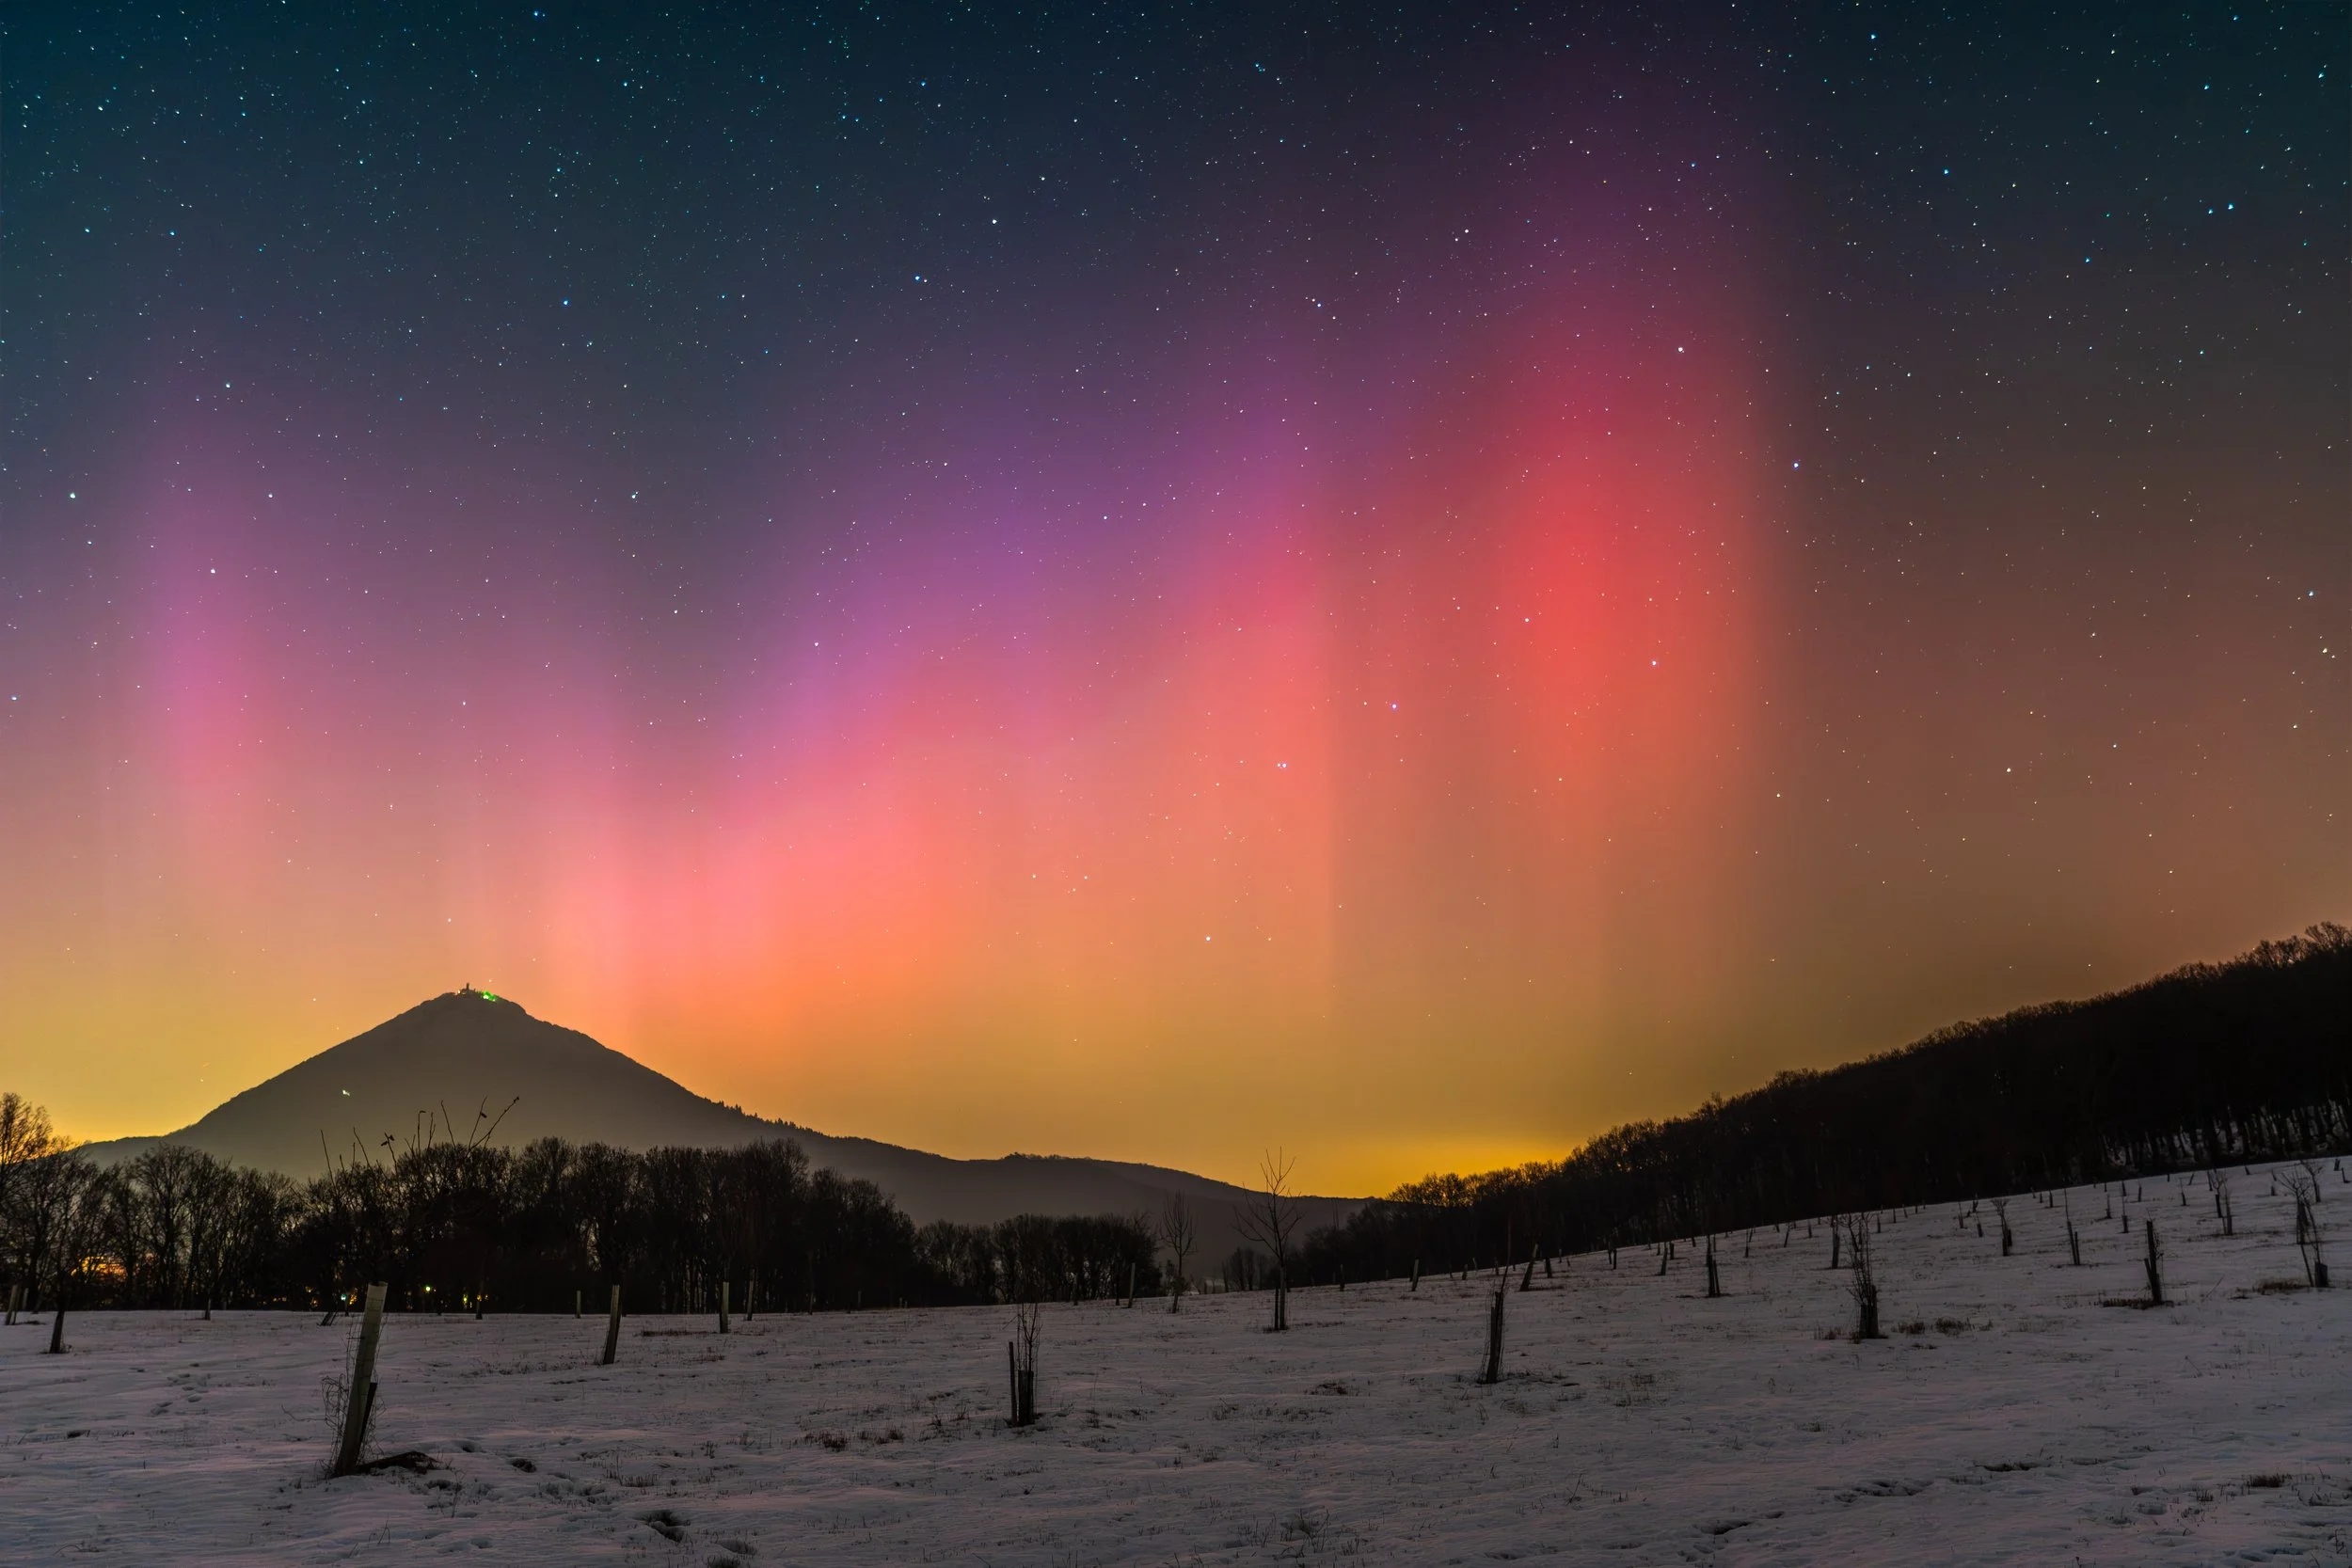
 AFTER
AFTER
 BEFORE
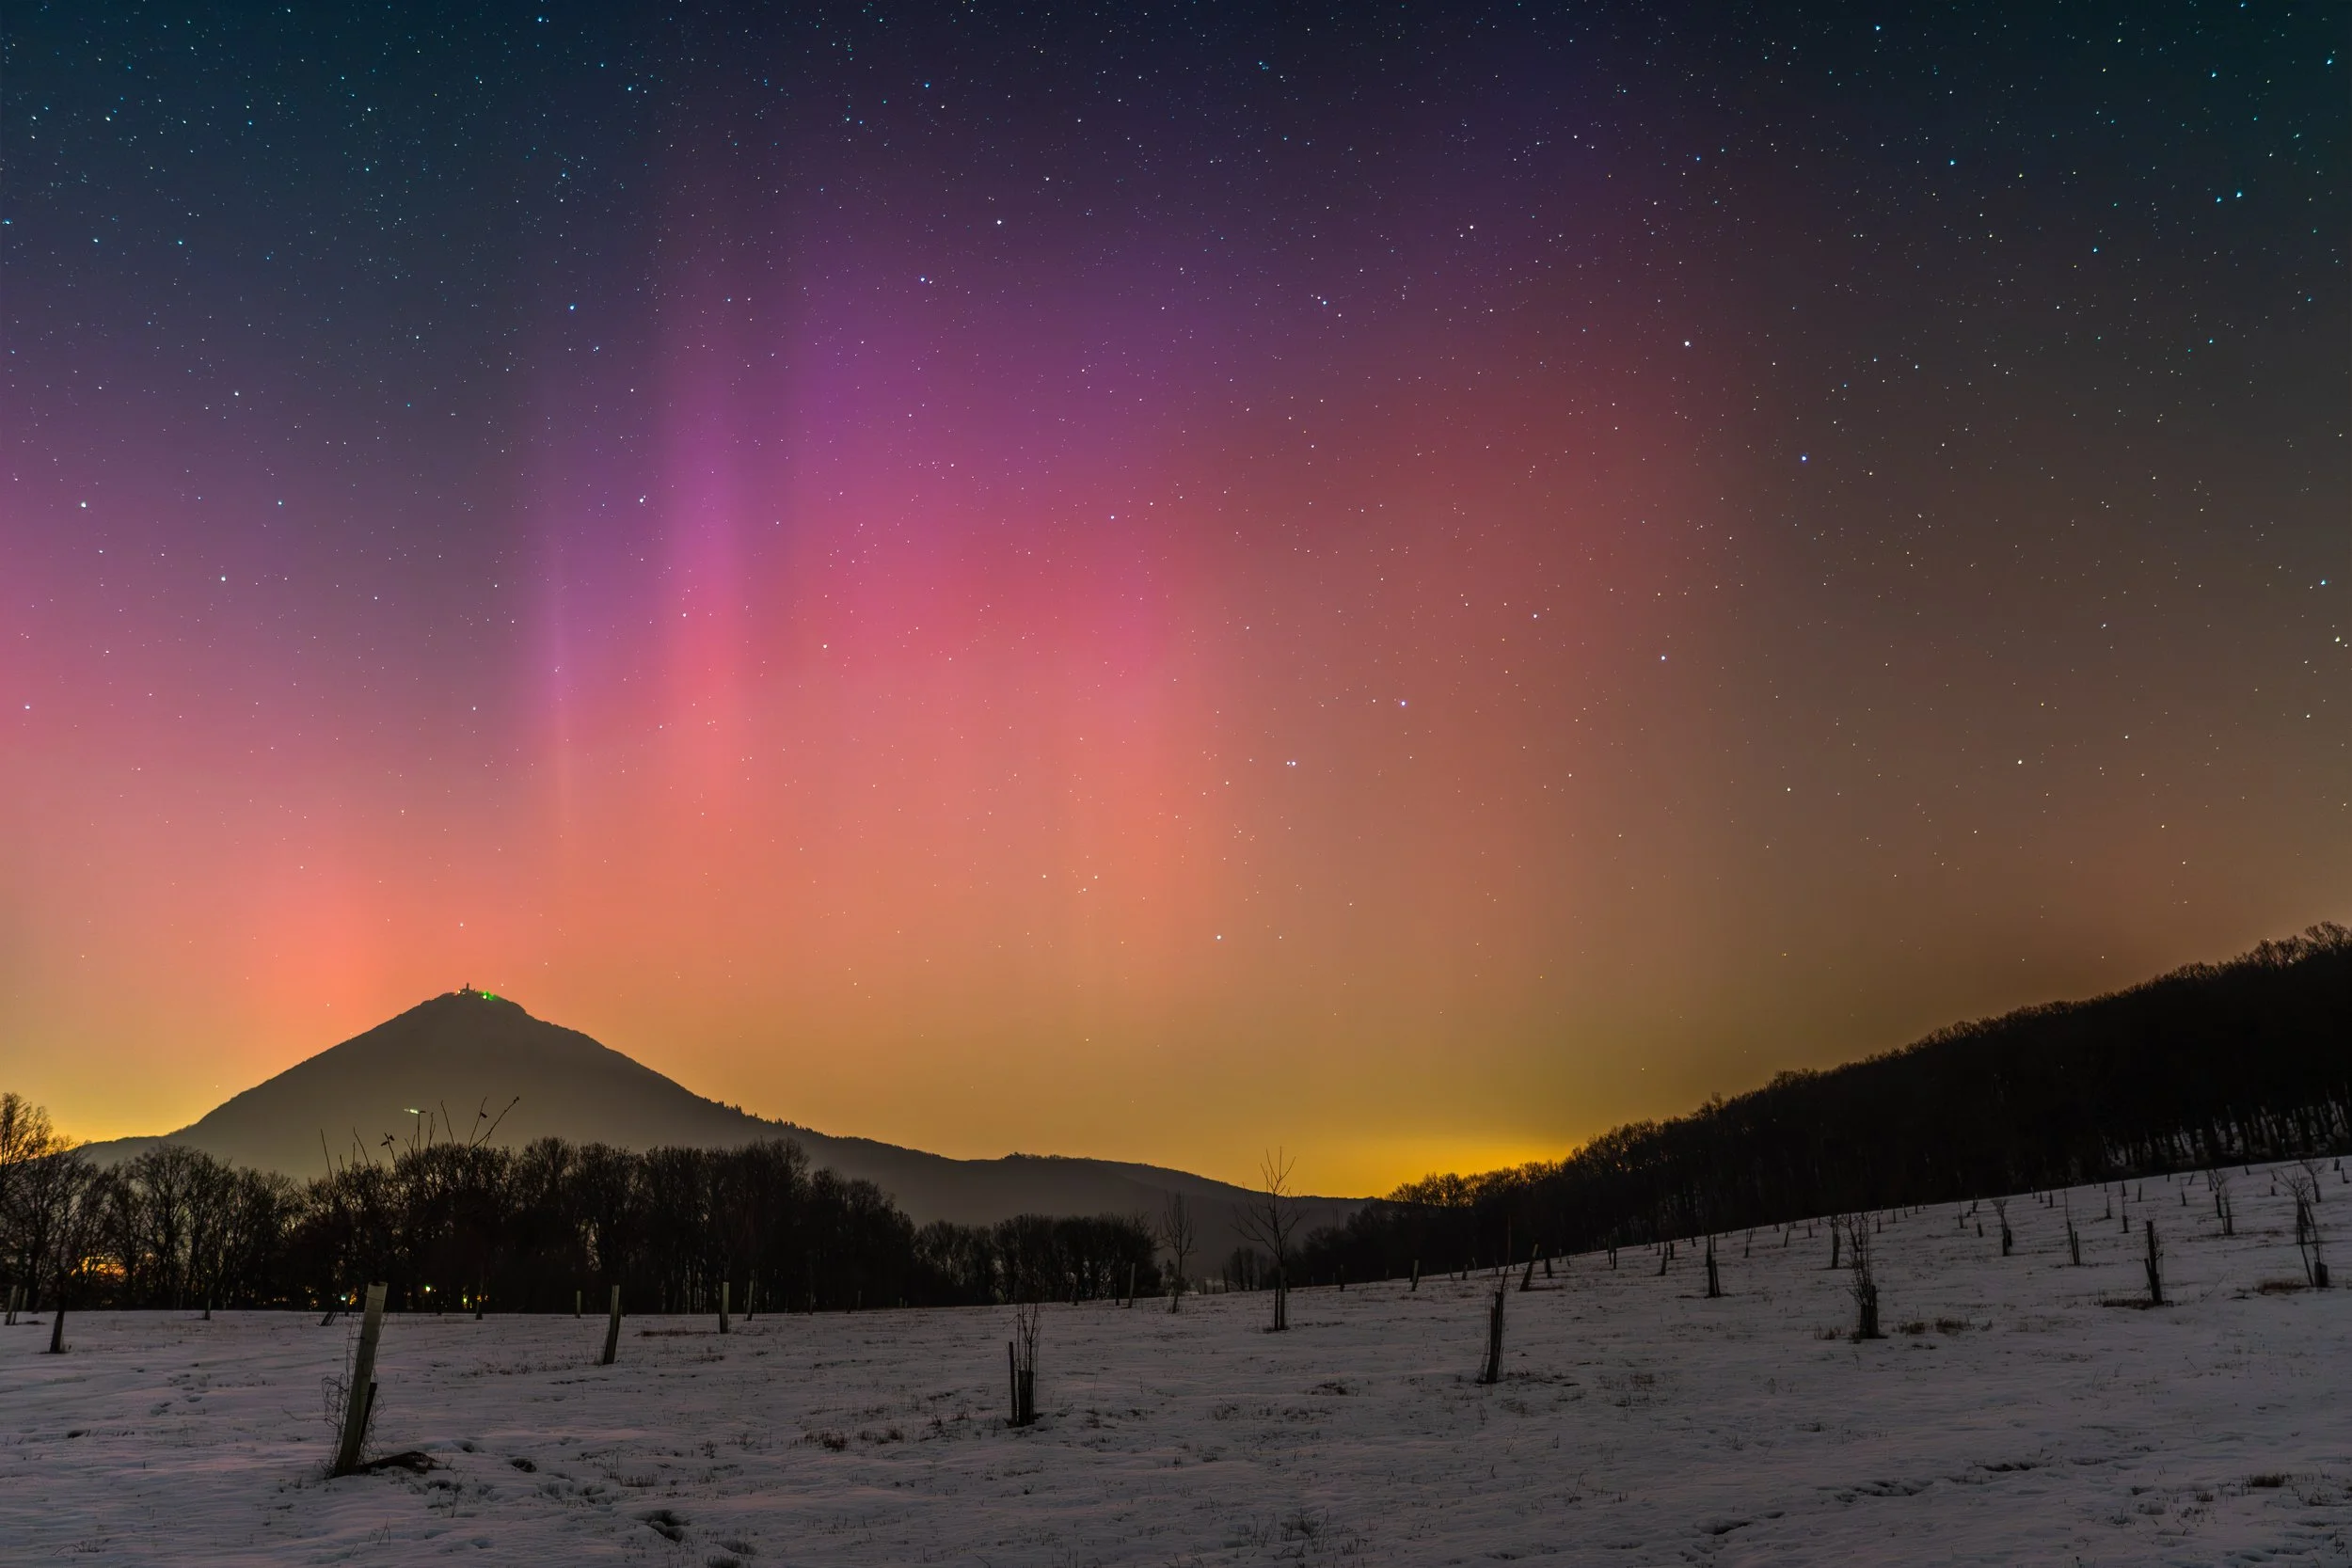
2. Local adjustments: Masking
Since a night scene requires a very different approach for the sky vs. the ground, masking is key here. I skipped the HSL panel entirely and handled color and light locally.
Sky Mask (Select Sky): I need the stars and the aurora to truly shine. In this mask, I push the Whites up. This separates the stars from the dark background and makes the aurora glow more intensely.
Foreground Mask (Select Foreground): The bottom part of the photo with the snow needs different care.
Light: I increase the Whites and Shadows so the snow isn't gray and lost in darkness, but rather reveals its texture.
Snow Color: Because the global White Balance is set to a very cool tone, the snow would naturally look blue. Inside this mask, I increase the Temperature (Temp) to warm it up, returning the snow to its natural white color.
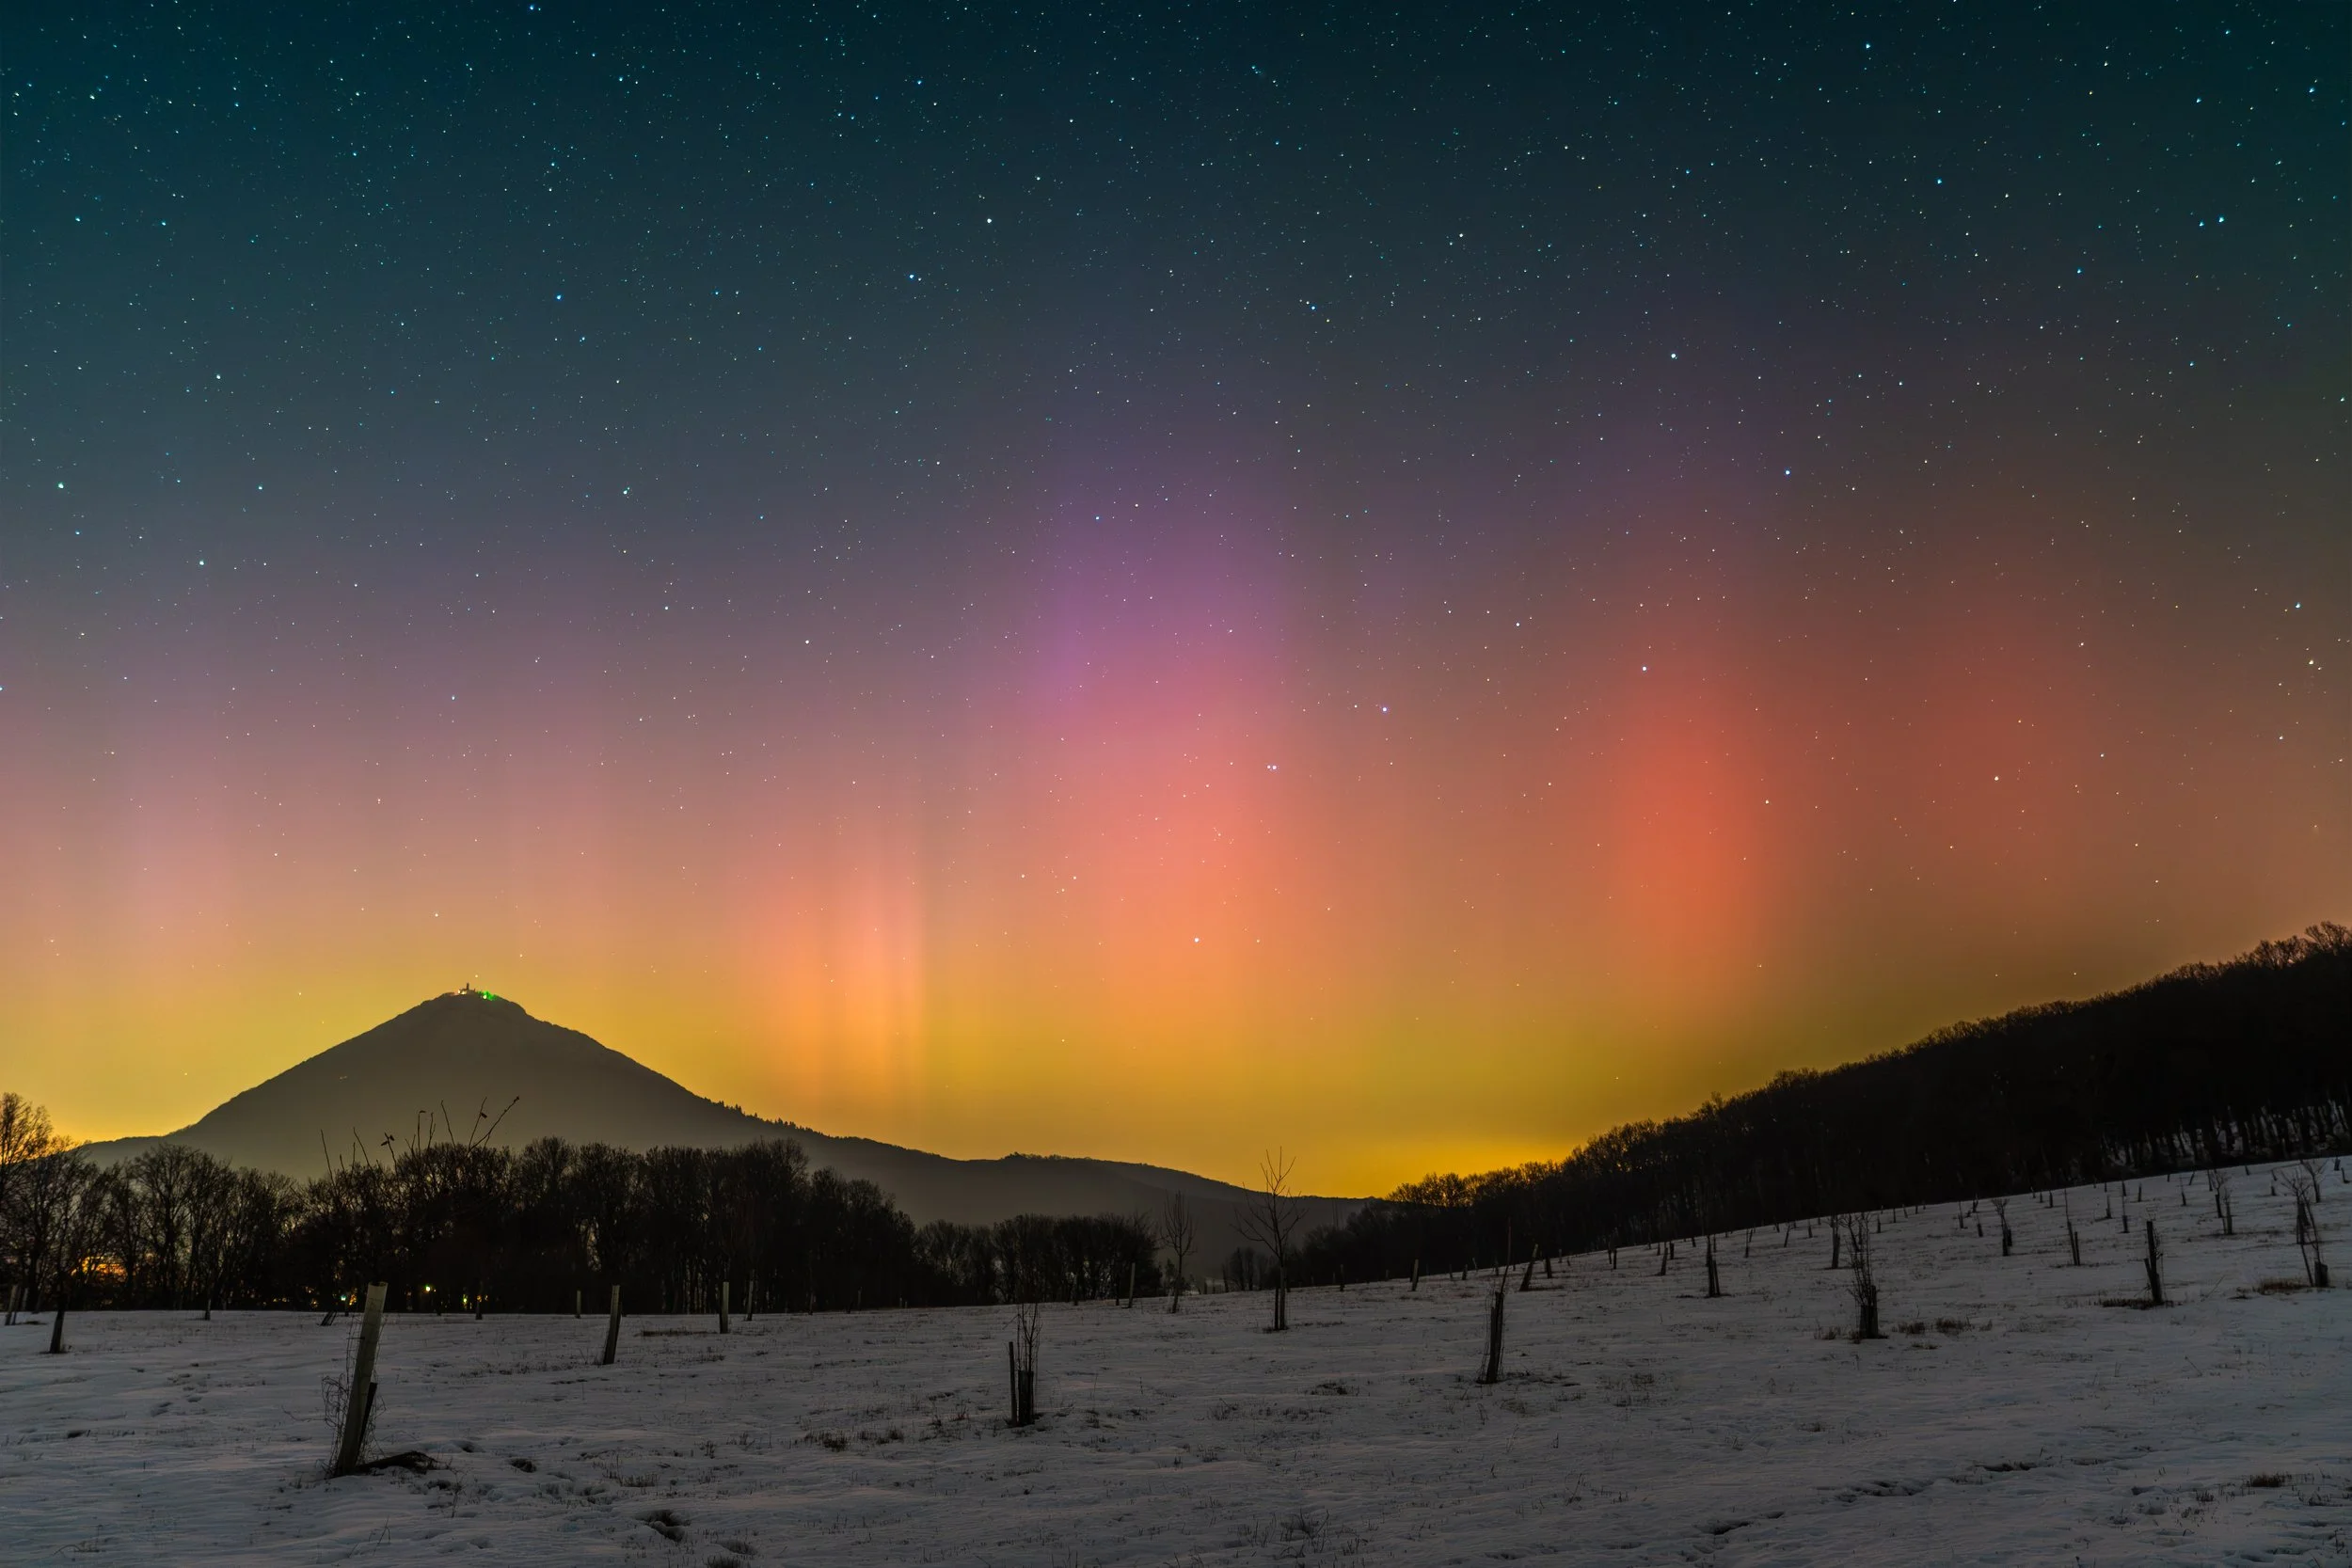
 AFTER
AFTER
 BEFORE
3. Final touch: Noise reduction
Since I shoot at high ISO, it is necessary to clean up digital noise. In the Detail section, I set the reduction to smooth out the grain while preserving the sharp details of the snow texture and the stars.
For noise reduction, I recommend the latest version of Adobe Lightroom Classic, which smoothes out noise while preserving detail.
4. Conclusion: From a "flat" shot to a magical memory
Remember that the RAW format is just a digital negative. The fact that the photo looks flat, gray, and lifeless at the beginning is not a flaw, but a feature. It contains all the data you need; it is just hidden.
Thanks to the combination of global darkening, structure enhancement, and precise masking (where we treated the starlight and snow color separately), we have restored depth and atmosphere to the image.
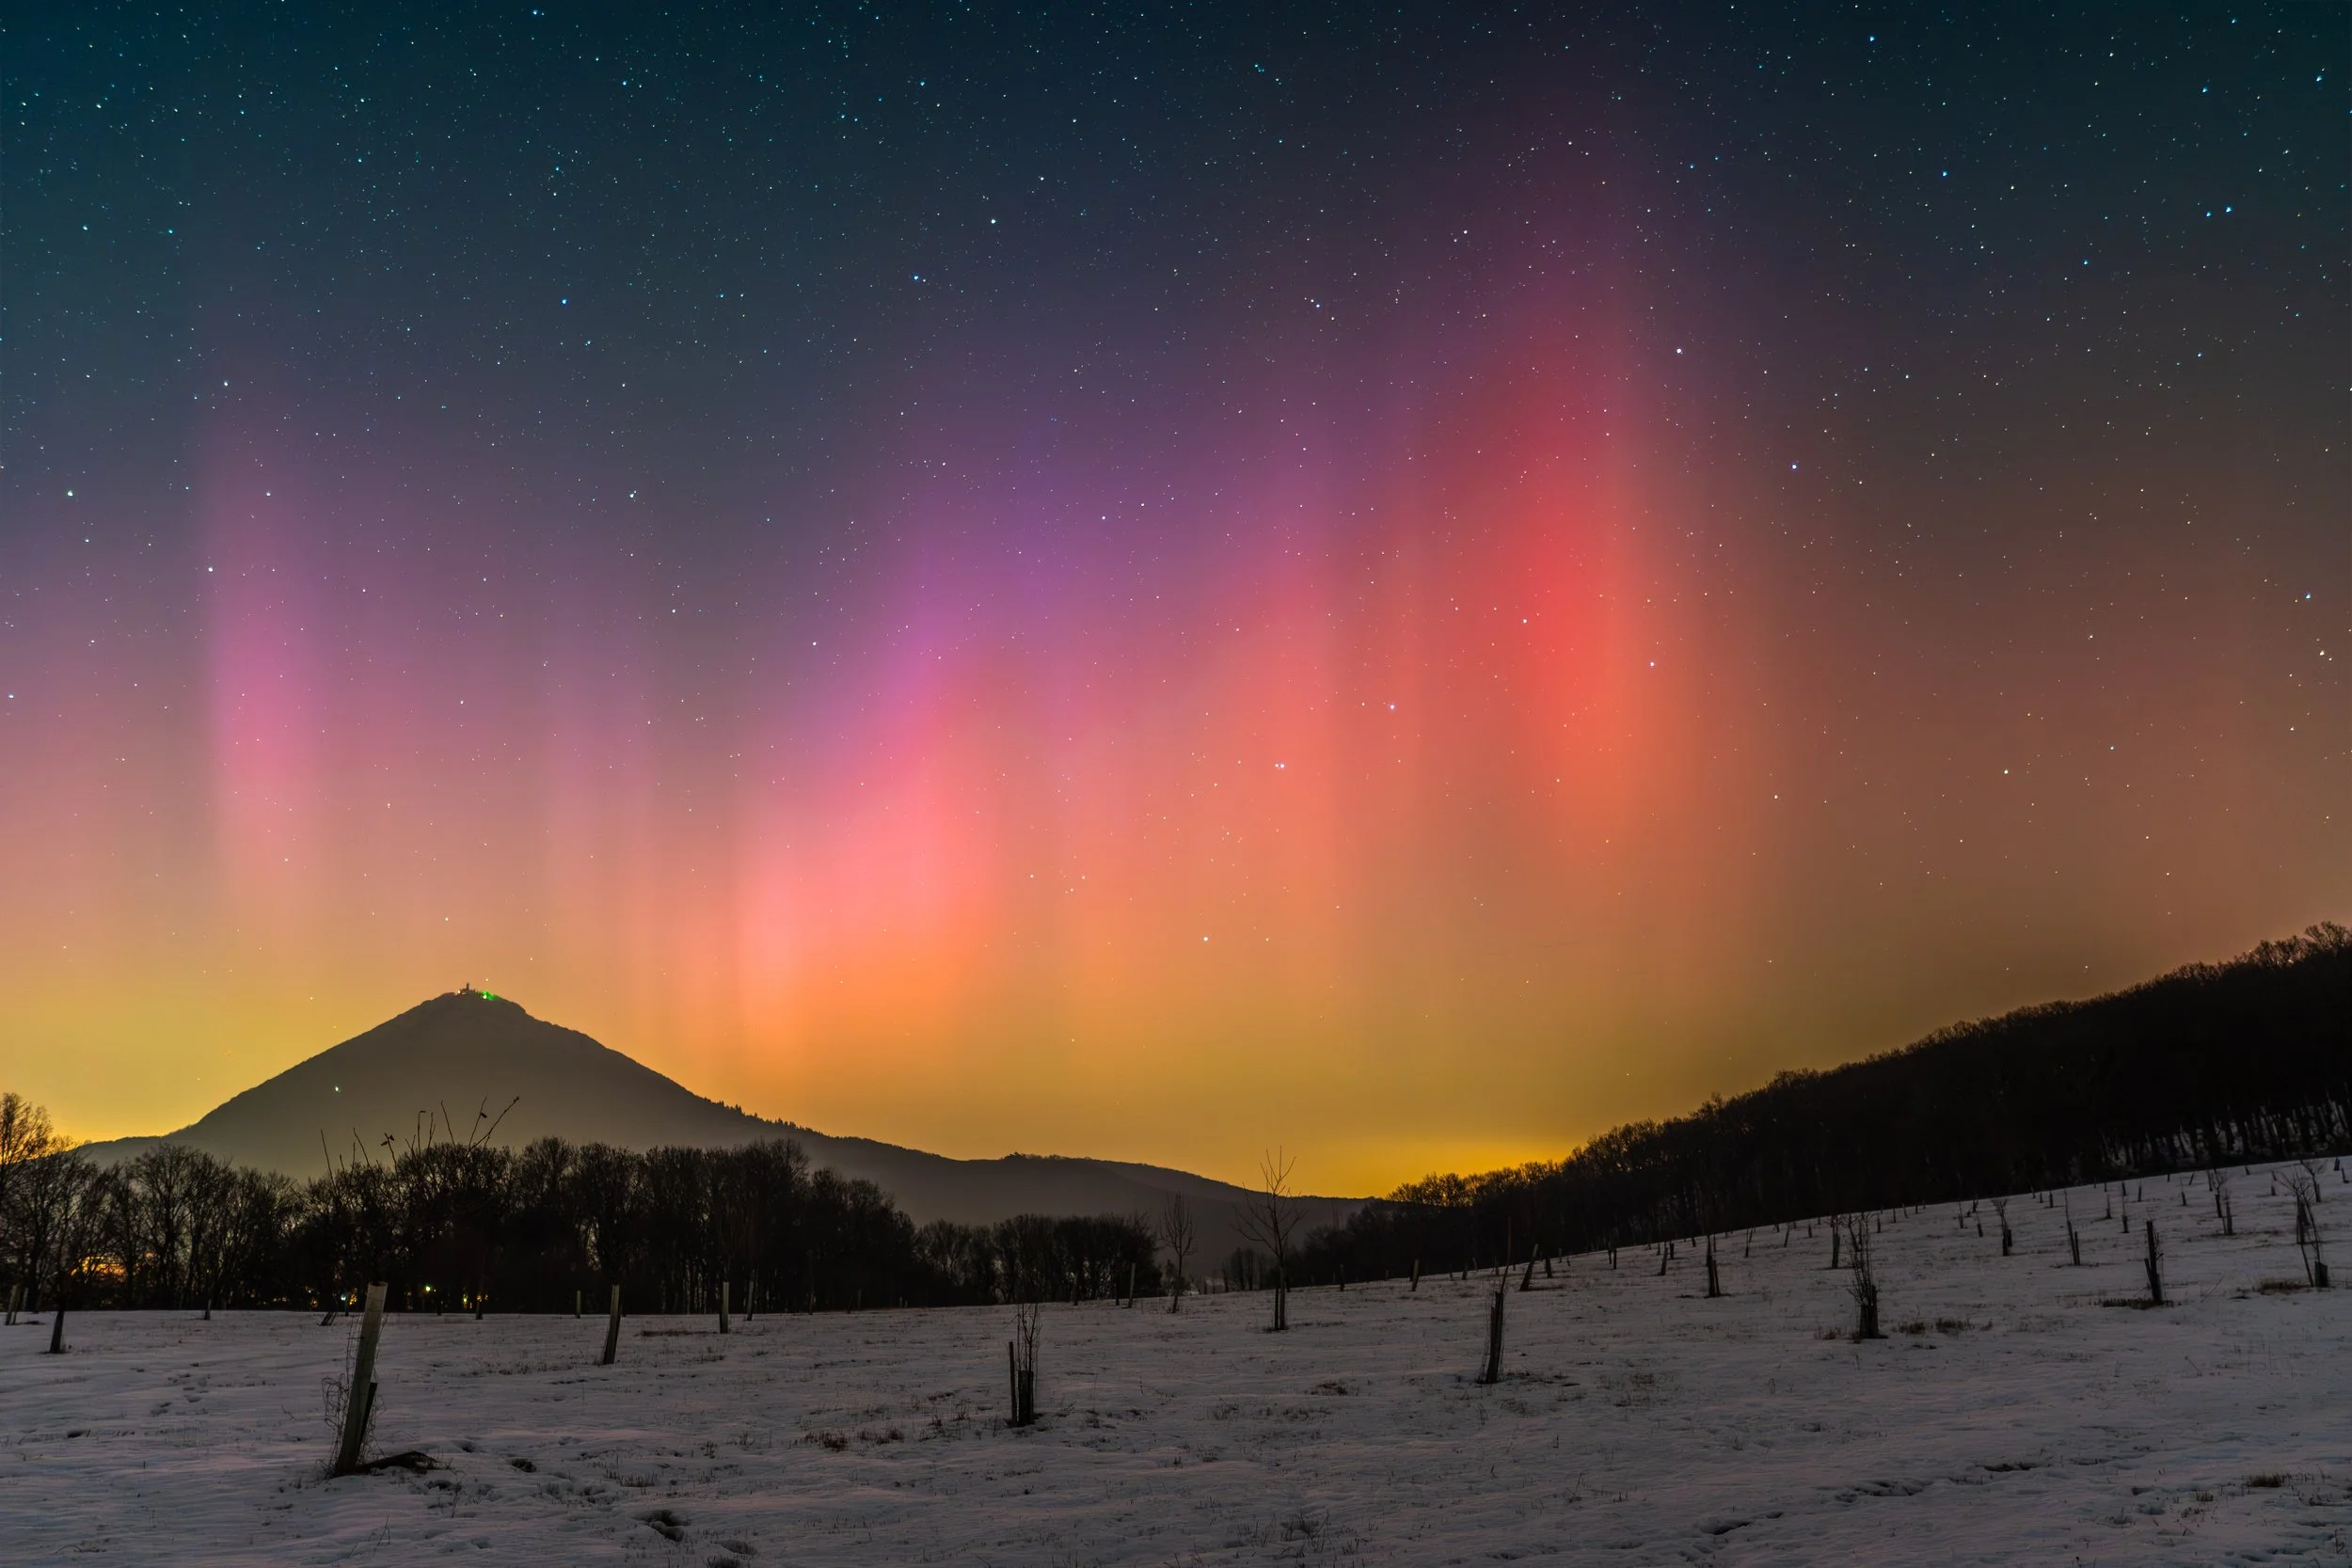
Below is a comparison of the raw shot straight from the camera and the final photograph edited according to this guide. The difference is staggering, isn't it?
AFTER
BEFORE
Did you manage to edit a photo using this guide?
Don't let it sit on your hard drive! Upload your captures to Instagram and tag me @simply.on. I’d love to see how your edit turned out, and I’ll share the best shots in my stories.
And if you want more photography tips and inspiration from the North, don't forget to follow.